Pages

Foodie Blogroll

Tuesday, November 29, 2011

Succulent Crab Cakes

Crabby Patties
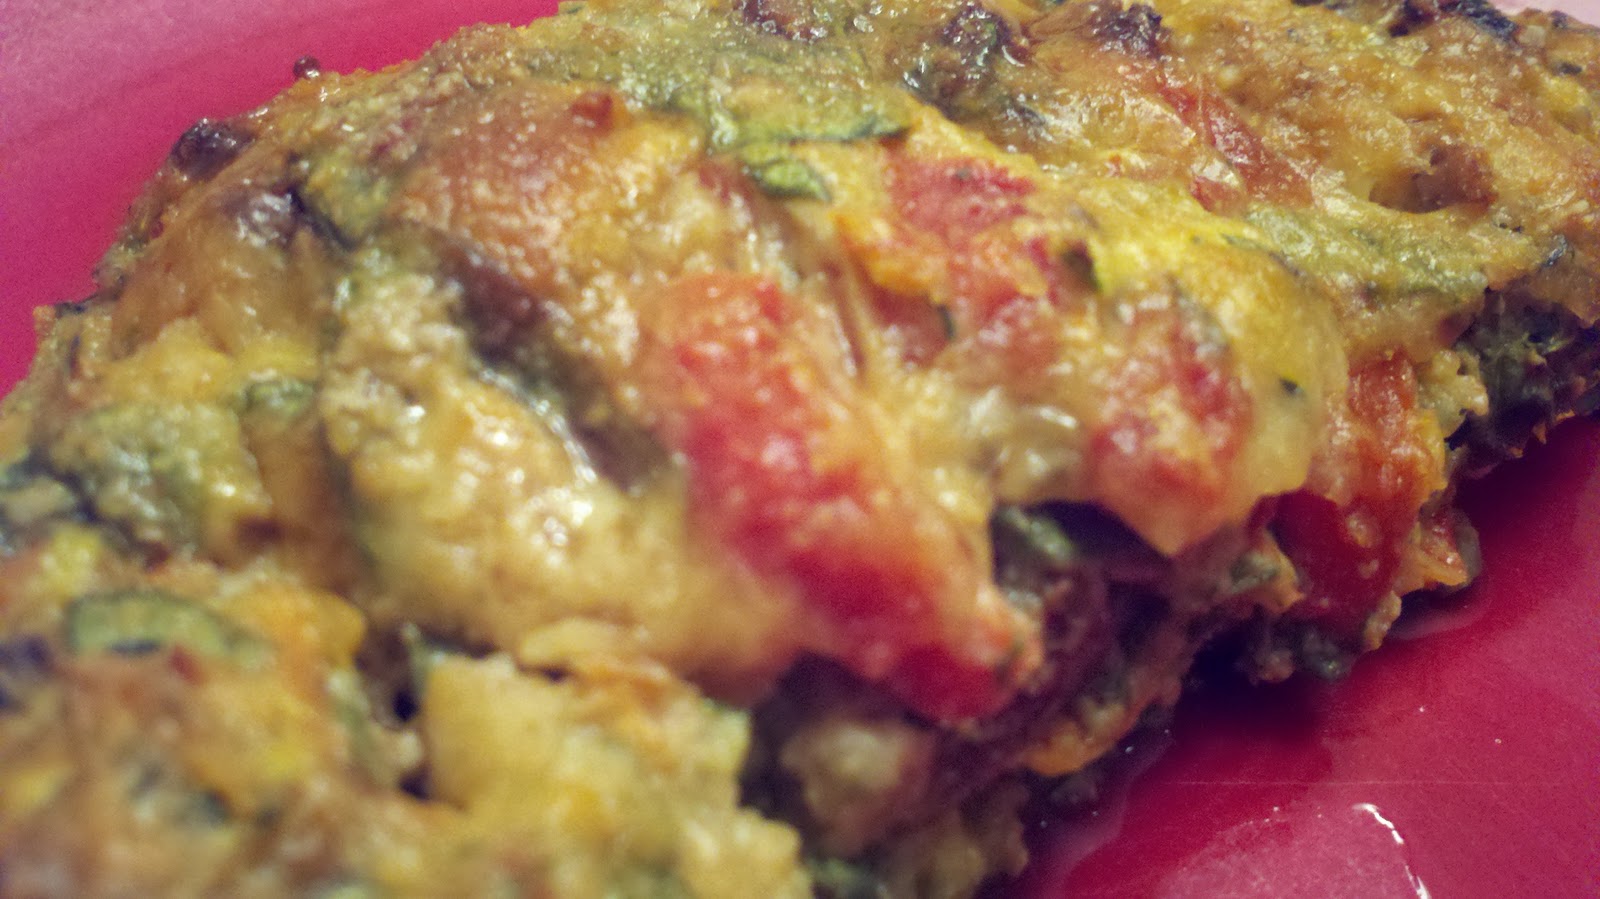
Ellie Krieger's recipe for crab cakes yields light and fluffy clouds of crab meat with minimal filling. The crab cakes are baked in the oven instead of fried which makes them low maintenance to prepare as well as much lighter. But don't fret they still have the crispy, golden crust you're accustomed to with the added bonus of a higher crab to breadcrumb ratio.

Succulent Crab Cakes
Gluten-Free
Serves 1 (Makes 3 Crab Cakes)


 Ingredients--
1 tbsp. liquid egg substitute
1/2 tsp. Dijon mustard
1/4 tsp. Worcestershire sauce
3/4 tsp. lemon juice
dash of hot sauce, to taste
1/4 tsp. Old Bay seasoning
2 tbsp. green bell pepper, finely diced
2 tsp. scallions, finely chopped
4 oz. lump crab meat, picked over for shells and cartilage
1/4 cup Homemade Bread Crumbs (recipe below), divided
salt & pepper

Optional Toppings--chopped scallions, hot sauce, Old Bay seasoning, or tartar sauce


1. Preheat the oven to 400 degrees. Coat a baking sheet with nonstick spray.

2. In a small bowl, mix together liquid egg, mustard, Worchestershire, lemon juice, hot sauce, and Old Bay.

3. Stir in the bell pepper and scallion.

4. Gently fold in the crab,salt, pepper, and 1 tbsp. of bread crumbs.

5. Pour remaining breadcrumbs into a shallow dish.

6. Divide the crab mixture into 3 even sections. Shape each section into a round patty and coat evenly in bread crumbs. Place breaded crab cakes on prepared baking sheet and flatten slightly.

7. Spray the top of each crab cake with a spritz of cooking spray.

8. Bake until golden on the bottom, about 8-10 minutes. Carefully flip with a spatula and respray with nonstick spray.

9. Bake until second side is golden brown, 8-10 minutes more. Serve hot, garnished with desired toppings.

Nutrition Information--approximately 220 calories per serving


Homemade Breadcrumbs


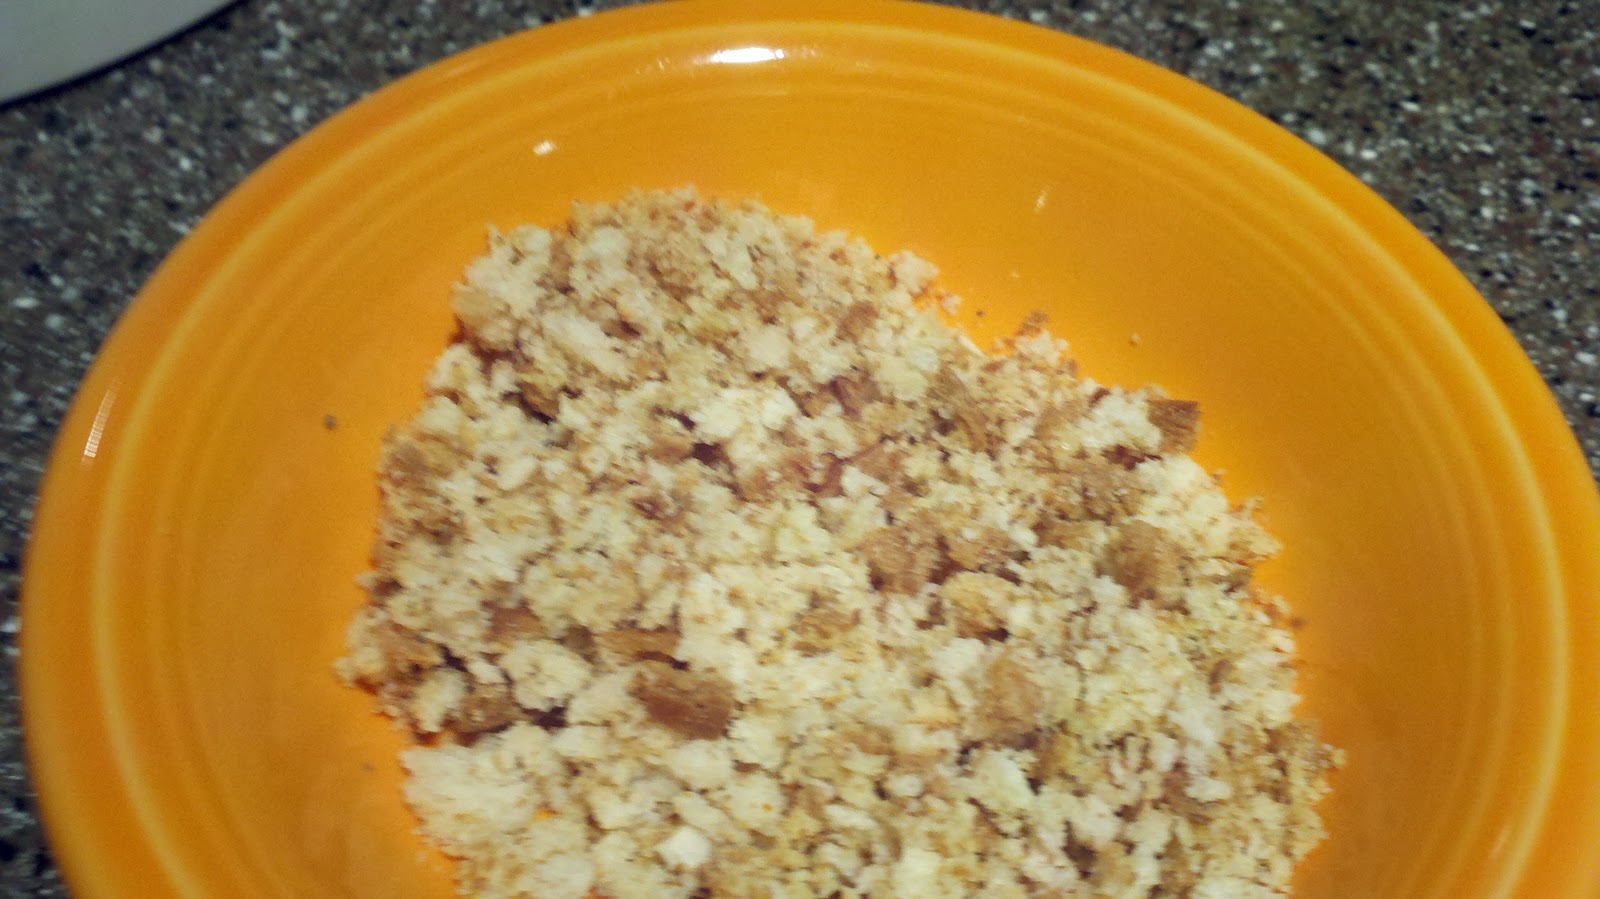
Toast 1 slice Light Gluten Free Sandwich Bread. Break into pieces and place in small food processor. Sprinkle with salt & pepper. Pulse until bread crumb consistency is reached. Makes approximately 1/4 cup.

Monday, November 28, 2011

Baked Ricotta with Blueberry Compote

Make Your Cheesecake & Eat It Too
This unique recipe, inspired by Claire Robinson, creates a gooey cheese pillow topped with warm, syrupy blueberries. What could possibly be better? It's like having cheesecake for breakfast. Technically, you're supposed to eat this on some sort of  (gluten free) bread but feel free to eat it straight from the ramekin. Both ways are outrageously good.

Baked Ricotta with Blueberry Compote
Gluten Free
Serves 1


Baked Ricotta-
1/4 cup part-skim ricotta cheese
1 tbsp. liquid egg substitute
1/4 tsp. lemon zest
1 tsp. agave nectar
dash of salt

Blueberry Compote-
1/4 cup blueberries (frozen or fresh)
2 tsp. Truvia sweetener
1.5 tsp. cornstarch
2 tbsp. cold water
1/4 tsp. of cinnamon
1/4 tsp. lemon zest

Gluten Free Bread (To spread ricotta/berry mixture on)

1. Preheat the oven to 350 degrees.

2. Put the ricotta in a fine-mesh strainer set over a bowl and let stand 10 minutes to remove excess liquid.

3. Transfer the cheese to a bowl. Stir in the remaining baked ricotta ingredients (egg, lemon zest, agave, and salt. Mix well.

4. Transfer ingredients to a small ramekin. Bake in the oven until puffed and beginning to brown, about 35 minutes. Remove from oven and let stand for 10 minutes before serving.

5. Meanwhile, stir all of the blueberry compote ingredients (blueberries, Truvia, cornstarch cold water, cinnamon, and lemon zest) together in a small saucepan.

6. Bring to boil and then reduce heat to low. Cook, 2-3 minutes until mixture becomes thick and syrupy, stirring frequently.

7. Serve baked ricotta on top of gluten free waffles or bread and top with blueberry compote.

Nutrition Information--approximately 190 calories per serving

Sunday, November 27, 2011

Portabello & "Sausage" Skillet

Greasy Spoon Upgrade
The Portabello & "Sausage" Skillet was modeled after the traditional breakfast skillet meal featured at your local breakfast diner. This one-skillet wonder from Hungry Girl, has all the familiar ingredients like meat, mushrooms, hash browns, and cheese, just without the half ton of grease the diner would use. It's a quick and filling meal that's perfect any time of the day or even multiple times a day!


Gluten-Free
Makes 1 serving

1 frozen meatless sausage patty (check for gluten)
1/2 cup sliced onion
1 large portabella mushroom, roughly chopped
2/3 cup frozen shredded hash browns (check for gluten)
2/3 cup liquid egg substitute
1 garlic clove, minced
1 wedge The Laughing Cow Light Creamy Swiss cheese
salt & pepper

1. Prepare sausage patty in the microwave according to package directions. Let cool, then chop into pieces and set aside.

2. Bring a skillet sprayed with nonstick spray to medium heat. Add onion, and saute until slightly softened about 3 minutes.

3. Reduce heat to medium low. Add mushroom and hash browns to the skillet. Cook until mushrooms have softened and hash browns are hot, 5-6 minutes.

4. Raise heat to medium. Stir cooked sausage pieces into veggie mixture. Add garlic and cheese wedge (break into pieces as you add it).

5. Pour in egg substitute. Scramble mixture until egg is cooked, 3-4 minutes.

6. Season to taste with salt and pepper.

Nutrition Information--approximately 310 calories


Saturday, November 26, 2011

Vegetable Bolognese Sauce

Better Than Bolognese
A typical bolognese sauce is made with some sort of meat, however, my version uses only vegetables which yields an even better result. This sauce, inspired by a recipe from Giada, is so hearty and flavorful no one will even miss the meat. You could use it as a topping for spaghetti squash, polenta, miracle noodles, or anything you wish.

Vegetable Bolognese Sauce
Gluten Free
Serves Two


Ingredients--
1 small carrot, cut into large chunks
1/2 small onion, peeled and cut into large chunks
4 oz (5-6) brussels sprouts, halved
1 garlic clove, minced
1/2 tsp. extra virgin olive oil
2 tsp. anchovy paste
3 sprigs fresh thyme
1 portabella mushroom, cleaned, gills removed and cut into small pieces
dash of double concentrated tomato paste (from a squeeze tube)
2 tbsp. red wine
2 cups crushed tomatoes
3 tbsp. fresh basil, chopped
salt and pepper

Optional Garnish-grated Parmesan cheese

1. Place carrot, onion, brussels sprouts, and garlic in a small food processor. Pulse until vegetables are chopped but still have some texture and chunkiness.

2. Heat olive oil in a large skillet over medium low heat. Stir in anchovy paste.

3. Add chopped vegetables and thyme sprigs. Season with salt and pepper. Cook until vegetables are tender, about 6 minutes.

4. Add mushrooms and tomato paste to pan. Cook until mushrooms begin to soften, 3-4 minutes (add some nonstick spray if vegetables begin to stick).

5. Stir in wine and crushed tomatoes. Raise heat to medium.

6. Once sauce begins to bubble, reduce heat to low. Let sauce simmer, stirring occasionally, until ready to use (at least 10 minutes).

7. Prior to serving, remove thyme stems. Garnish with cheese if desired.


Friday, November 25, 2011

Stuffed Sweet Dumpling Squash

Squash-aholics Anonymous
This is yet another absolutely divine recipe utilizing squash (I think I'm addicted!). Sweet Dumpling Squash is a type of winter squash that has a hint of a sweet flavor (hence the name). The sweetness of the squash pairs perfectly with this slightly spicy filling comprised of portobello mushrooms, quinoa, walnuts and other delicious add-ins.

Stuffed Sweet Dumpling Squash
Gluten Free
Serves Two (2 Squash Quarters per Serving)


Ingredients--
1 Sweet Dumpling squash, seeds and stem removed and cut into quarters
2 tsp. extra-virgin olive oil, divided
Filling--
1/4 cup quinoa
3/4 cup + 1 tbsp. low-sodium chicken broth
1 portobello mushroom, cleaned and cut into small cubes
1 clove garlic, minced
3 tbsp. fresh parsley, chopped
2 tbsp. walnuts, chopped
3/4 tsp. red wine vinegar
crushed red pepper flakes, to taste
salt & pepper

1. Preheat oven to 425 degrees. Line a baking sheet with aluminum foil and spray with nonstick spray.

2. Brush each squash quarter with a 1/4 tsp. of olive oil and season with salt and pepper. Place cut side down on baking sheet. Roast the squash until tender and caramelized, 25-28 minutes (tip squash over halfway through so other part of flesh will caramelize). If squash finishes before filling is ready, tent with aluminum foil.

3. Meanwhile, prepare the quinoa for the filling. Place the quinoa and 3/4 cup chicken broth in a small saucepan. Bring to boil, then reduce heat and simmer covered until liquid is absorbed, about 18 minutes. Fluff with a fork prior to serving.

4. To prepare the mushrooms, heat 1/2 tsp. of olive in a small pan over medium heat. Once oil is hot, add garlic and saute for about a minute.

5. Add mushrooms and cook until tender about 8 minutes. Deglaze the pan with 1 tbsp. chicken broth and continue cooking until the majority of the liquid is absorbed, being sure to scrape the bottom of the pan. Season mushrooms to taste with salt, pepper, and crushed red pepper flakes.

6. To assemble the filling (once mushrooms, quinoa and squash are cooked), combine quinoa, mushrooms, parsley, walnuts, red wine vinegar in a medium bowl. Season with salt and pepper and additional red pepper flakes if desired.

7. Spoon filling into squash quarters and serve!


Monday, November 21, 2011

Upside-Down Pan Pizza

Pizza Pizza!
This pizza is just like  a Pizza Hut pan pizza! Only not so much. It's upside down and tastes way better than any greasy takeout pizza. This unusual and satisfying deep dish pizza is created by layering a baking dish with sauteed vegetables and marinara sauce than topping it with cheese. The grand finale is a fluffy homemade crust that is easily produced with Bisquick. This scrumptious pizza is a variation of a recipe from Joy Bauer.

Upside-Down Pan Pizza
Gluten Free
Makes 1 Large Serving


1/2 small onion, diced
2 tbsp. green bell pepper, diced
3/4 cup crushed tomatoes
1 portabello mushroom, stems removed, gills scraped out, and diced
1/4 tsp. dried oregano
1/4 tsp. dried basil
dash of crushed red pepper flakes
1 oz. part-skim mozzarella cheese, shredded
2 tsp. Parmesan cheese, grated
2 tbsp. gluten free Bisquick
1/4 cup unsweetened Silk Almond Milk
1.5 tbsp liquid egg substitute
salt and pepper

1. Preheat the oven to 375 degrees. Spray a small casserole dish (about 3x4 inches) with nonstick spray and set aside.

2. Coat a medium nonstick skillet with spray, and preheat over medium heat.

3. Add onion, bell pepper, and mushrooms to the skillet and saute until vegetables have softened (8-9 minutes).


4. While the vegetables are cooking, stir together crushed tomatoes, oregano, basil, and red pepper flakes in a small bowl. Season with salt and pepper and combine.

5. Stir tomato mixture into vegetables . Reduce heat to low and let simmer while you prepare the crust.

6. To make the crust, whisk together baking mix, milk, and liquid egg in a small bowl.

7. Spoon the veggie/tomato mixture into prepared casserole dish. Evenly sprinkle cheeses (parmesan and mozzarella)  on top of veggies.


8. Pour crust batter over cheeses (don't worry, batter will be runny). Sprinkle with additional oregano and crushed red pepper if desired.


9. Bake for 25 minutes, or until top is golden brown and a knife inserted in the center comes out clean.

10. Let cool for 5 minutes minutes before serving.


Sunday, November 20, 2011

Chipotle Chicken

Chipotle Craze
When you're cooking for a picky eater, there's a limited number of directions you go. Tonight, I stuck with the always popular chicken and tried a recipe from Joy Bauer. In this dish, chicken thighs are slowly braised it in a slightly addictive chipotle sauce that has a spicy and delicious kick.

Chipotle Chicken
Gluten Free
Serves 2

2 boneless, skinless chicken thighs (about 5 oz each), trimmed of excess fat
1/4 cup low sodium chicken broth + more to add while cooking
1 garlic clove, minced
1/2 green bell pepper, seeded and chopped
1/2 small onion, diced
1 tsp. dried oregano
1/2 tsp. cumin
dash of cayenne pepper, to taste
1 (14.5 oz) can crushed tomatoes
2 tbsp. apple cider-vinegar
1 chipotle chile in adobo sauce, (add adobo sauce too) finely minced
salt & pepper

1. Liberally coat a medium pot with olive oil spray and preheat over medium-high heat.

2. Season chicken thighs with salt and pepper on both sides.

3. Add thighs to pot and sear until golden brown on both sides (about 2-3 min per side). Transfer to a plate and set aside.

4. Add a splash (1-2 tbsp) of chicken broth to deglaze the pot (be careful of steam). Scrape up the browned bits with a wooden spoon.

5. Reduce heat to medium. Add the onion and bell pepper and cook until softened slightly, about 5 minutes. Add a tablespoon of broth as necessary to prevent scorching while cooking.

6. Add garlic, oregano, cumin, and cayenne pepper, and cook until fragrant, about a minute.

7. Add crushed tomatoes, vinegar, chipotle chiles, adobo sauce, and 1/4 cup of chicken broth. Stir well to combine. Season with salt and pepper.

8. Return the chicken thighs to the pot, submerging them in the tomato mixture. Bring the sauce to a boil.

9. Reduce heat to low, cover and simmer for 20 minutes.

10. Uncover the pot and continue simmering over low heat until chicken is tender, about 20 minutes.

Saturday, November 19, 2011

Cranberry Beans

A Newfangled  Discovery
I visited a farmer's market this afternoon where I stumbled upon cranberry beans, a vegetable that's almost too pretty to eat. When you buy them fresh, these brilliantly pink beans are encased in a cranberry and white pod like a snap pea. Once shucked, the beans resemble a cannelini bean and are just as versatile. I made a simple salad with spinach (fresh from my mom's garden!), cranberry beans, walnuts, and a lemon  dressing. The cooking time is pretty long but there's really no effort involved. Sadly, the beans lose their brilliant color once cooked but they are still quite tasty.


For a basic preparation-- 
1. Shell the beans and place in a heavy bottomed pot. Cover with about 2 inches of water (do not salt)
2. Bring water to boil, then reduce to simmer.
3. Cover pot, and cook under beans are tender (about an hour)


Friday, November 18, 2011

Mediterranean Meatloaf

Exquisite Evolution
This amazing recipe from Joy Bauer elevates meatloaf from a homey comfort food to an elegant entree. A rainbow medley of vegetables are mixed into ground turkey to form a fresh and flavorful meatloaf.  The ingredient list may be a little long but since it 's all mixed in one bowl, you can just chop and drop.

Mediterranean Meatloaf
Gluten-Free
Serves 6


Ingredients--
1/4 lb. lean ground turkey
1 cup packed spinach leaves, chopped
1/2 cup Parmesan cheese, grated
1/2 cup roasted red pepper, diced
1/2 cup zucchini, unpeeled and shredded
1/4 cup sun-dried tomatoes, softened in boiling water and finely diced
1/4 cup carrot, grated
1 clove garlic, minced
2 tbsp. no-salt-added tomato paste
2 tsp. Worcestershire sauce
1 tsp. dried oregano
1/2 tsp. dried thyme
1/4 tsp. salt
1/2 tsp pepper
1/4 tsp. crushed red pepper flakes
3 tbsp. liquid egg substitute
Topping- 1 tbsp. Parmesan cheese, grated

1. Preheat oven to 350 degrees. Line a baking sheet with aluminum foil, and coat the foil with nonstick spray.

2. In large mixing bowl, combine all of the ingredients except for the turkey and topping. Stir until evenly incorporated.

3. Use your hands to evenly distribute turkey into vegetable mixture.

4. Transfer mixture to the prepared baking sheet and shape into a loaf about 2 inches thick. Sprinkle with 1 tbsp. Parmesan cheese (the topping).

5. Bake for 55 minutes, or until internal temperature registers 160 degrees.

Nutrition Information--approximately 205 calories, 26g protein, 6g fat per serving


Thursday, November 17, 2011

Portabello Panini

BYOC Recipe
I needed something to serve with soup at a dinner party so I thought a Portabello Panini would the perfect thing for both gluten and gluten free people to enjoy. The meaty mushrooms are used as the bread and can be filled with whatever you wish. (I used feta, mozzarella, and sundried tomatoes). This recipe is so easy and versatile, you don't even really need instructions or measurements. As Claire Robinson always says it's time to "Be Your Own Chef".

Portabello Panini
Gluten Free
Makes 1

Clean 2 Portabello Mushrooms. Remove the stems and scrape out the gills.

Cut each mushroom in half so you have 4 pieces. Add desired sandwich fillings to two pieces  Top with the remaining pieces to form sandwiches.

Brush outside of mushrooms with olive oil. Carefully place sandwiches under panini press and cook for about 2 minutes per side.

Basic Math


       Cranberry Sauce (Cranberry Concoction Post from November 16)

 +  Strawberry Shortcake Muffins (Summer Surprise Post from November 10)
                                                                                                                                         
   
 =  Match Made in Heaven!

Wednesday, November 16, 2011

Cranberry Sauce

Cranberry Concoction
There's nothing better than gooey, tart cranberry sauce during Thanksgiving time (or anytime you can find fresh cranberries!). This recipe leans towards the sweeter side but you could easily alter it to whatever your prefer.

Cranberry Sauce
Gluten Free
Makes approximately 2 cups


Ingredients--
1 (12 oz) bag fresh cranberries
1 cup Truvia + more to taste
zest of 1 small lemon
3/4 cup water
2 tsp. cinnamon
1/2 tsp. ground nutmeg
1/2 tsp. ground ginger
dash of ground cloves
dash of salt

1. Pour cranberries into a medium saucepan. Remove a 1/2 cup of cranberries and set aside.

2. Add Truvia, lemon zest, and water to saucepan. Stir until ingredients are incorporated.

3. Cook cranberries over low heat, stirring occasionally, until cranberries have softened and Truvia is dissolved (about 10 minutes).

4. Raise heat to medium and stir in spices (cinnamon, nutmeg, ginger, and cloves) and salt. Cook, stirring occasionally, until cranberries begin to burst and mixture thickens (12-15 minutes).

5. Stir in reserved cranberries. Taste and add more Truvia if necessary (will depend on natural sweetness of the cranberries).

6. Cranberry sauce be served warm, cold, room, or at room temperature.

Monday, November 14, 2011

Miso Glazed Cod

Unleash the Umami
Umami, the often forgotten fifth taste, means "pleasant, savory taste" in Japanese and can be found in a variety of  foods ranging from mushrooms to cheese. Miso Glazed Cod is packed with umami flavor thanks to the miso paste and mirin. Although it requires a few specialty ingredients, this dish is really simple to make and worth the unique items (which can be found in the Asian section of most grocery stores).


Miso Glazed Cod
Gluten Free
Makes 1 Serving


1 (6 oz) cod fillet
1 tbsp. white miso paste (check for gluten, some varieties are made with barley)
2 tsp. brown sugar
1/8 tsp. toasted seasame oil
1 tsp. mirin(Japanese cooking wine; check brand for gluten)

1. In a small bowl (be sure it's large enough to fit the fish), whisk together miso, brown sugar, seasame oil, and mirin until sugar dissolves.

2. Place cod in bowl, turning to coat entire filet in marinade. Cover with aluminum foil and place in refrigerator for 30 minutes to an hour.

3. Preheat broiler. Line a small baking sheet with aluminum foil and spray with nonstick spray.

4. Place fish on baking sheet (reserve marinade) and broil 3-4 minutes or until the top is slightly charred.

5. Remove fish from oven and brush with remaining marinade.

6. Reduce the oven temperature to 375 degrees and cook until fish is flaky by moist, 5-6 minutes.

Nutrition Information--approximately 220 calories, 3g fat, 32g protein

Sunday, November 13, 2011

Pan-Seared Pork Tenderloin

Choose Your Own Adventure
The great thing about pork tenderloin is that once you know a basic cooking technique, you can vary it in so many different ways by using a variety of sauces and toppings such as teriyaki sauce or marinara sauce. Tonight, I made a simple pan-seared pork tenderloin drizzled with a divine homemade barbecue sauce.

Pan-Seared Pork Tenderloin
Gluten Free
Serves 4

1.25 lb. extra lean pork tenderloin
2 tsp. extra-virgin olive oil
salt & pepper
Plus any extra seasonings you choose

1. Trim pork of any visible fat and silverskin. Carefully cut the pork lengthwise without cutting all the way through so it opens up like a book. You should end up with a large, flat piece of pork.

2. Cut into 4 even, portions (they will be narrow rectangles). Season top side of pork with salt and pepper.

3. Heat the olive oil in a large skillet over medium heat.

4. Once pan is hot, add the pork to the pan, seasoned side down, then season other side. Cook until an instant thermometer reads 155 degrees. This should take about 6-7 minutes per side.


Hungry Girl BBQ Sauce
Gluten Free
Makes about 6 tbsp

1/4 cup canned tomato sauce
2 tbsp ketchup
2 tsp brown sugar (not packed)
2 tsp cider vinegar
1/2 tsp garlic powder
crushed red pepper flakes, to taste

Combine all ingredients in a small bowl and mix well.


Friday, November 11, 2011

Bella Burger

Vegetarian Victory
A sandwich comprised of a portobella mushroom may not sound very exciting, but don't knock it til you try it. The Bella Burger contains a pan-roasted portobella mushroom, melted cheese, and sauteed onions that sandwiched between two toasted bread slices smeared with my special sauce. This delectable combination transforms humble ingredients into an unconventional masterpiece (originally inspired by Hungry Girl).

Bella Burger
Gluten Free
Makes 1 Sandwich


Ingredients--
1 large portobella mushroom cup,wiped clean and gills scraped out
1 tsp. extra virgin olive oil
1/2 tsp. dried thyme leaves
1/8 tsp salt, or more to taste
1 tbsp. special sauce (see recipe below)
dash of garlic powder
2 tbsp. reduced fat mozzarella cheese, shredded
2 slices light gluten free sandwich bread
1 teaspoon Promise butter spread
1/2 small onion, cut into half rings

1. Drizzle oil on both sides of mushroom and then use your hands to rub in thyme and salt. Set aside.

2. Spread butter on one side of each bread slice. Sprinkle with garlic powder.

3. Spray a medium skillet with nonstick spray and bring to medium heat. Place bread in skillet, buttered sides down. Cook until toasted and golden brown, then place on plate with buttered sides down.

4. Place mushroom in skillet, rounded side up, then place the onion slices beside the mushroom. Cook for 5 minutes, stirring onions occasionally.

5. After 5 minutes, remove onions from pan and set aside in a small dish.

6. Flip mushroom and top evenly with cheese. Cook for another 5 minutes.

7. Spread half of the special sauce on each slice of bread on the side facing up (not the buttered side).

8. Place mushroom on top of special sauce on one slice of bread. Place onions on top of mushroom and finish with remaining slice of bread (buttered side out). Eat up!


A mixture of roasted beets, yogurt, and ketchup creates an unexpectedly exquisite sauce with a hint of sweetness. This sauce is based on a recipe I saw on The Chew.

Special Sauce
Gluten Free


Ingredients--
1 beet, stems and leaves removed
1/4 cup fat-free Greek yogurt
2 tbsp. ketchup
salt & pepper

1. Preheat oven to 350 degree.

2.Scrub beet well than wrap in tightly in aluminium foil. Place on baking sheet and roast until tender, about 1.5 hours.

3. Unwrap beet carefully and discard foil and any liquid that has accumulated. Allow beet to cool.

4. Once beet is cool, peel it and place small food processor or blender. Puree until smooth.

5. Transfer beet to a small bowl. Stir in yogurt and ketchup. Season with salt and pepper.

Thursday, November 10, 2011

Strawberry Shortcake Muffins

Summer Surprise
It's difficult to focus on traditional Fall foods when it's sunny and 76 degrees outside. Today, I decided to embrace the weather and bake a scrumptious summer dessert. Strawberry Shortcake Muffins are light and delicious muffins that take advantage of a baking mix for super quick preparation. The muffins, adapted from a Cooking Light recipe, are filled with fresh strawberries to create a strawberry packed flavor. Plus there's a strawberry garnish for a perfect presentation. Since its far from prime strawberry season, I elected to use frozen strawberries which worked fine in this recipe. Just be sure to defrost, drain, and dry them thoroughly.

Strawberry Shortcake Muffins
Gluten Free
Makes 12 Muffins


Ingredients--
5.4 ounces (about 1.25 cups) + 1 tsp.  gluten-free baking and pancake mix (such as Pamela's)
1/2 cup Truvia
6 tbsp. unsweetened Almond Milk
2 tbsp. Promise butter spread, melted
1 tbsp. butter, melted
1 tbsp. pure vanilla extract
1/4 cup liquid egg substitute
1/4 cup diced strawberries
Garnish- 12 strawberry slices

1. Preheat oven to 375 degrees. Line a 12-cup muffin tin with muffin liners.

2. Combine 5.4 oz baking mix and Truvia in a medium bowl; stir with a whisk. Make a well in the center of mixture.

3. Combine milk, Promise, butter, vanilla, and egg substitute in a separate bowl. Stir well with a whisk.

4. Pour milk mixture into the dry ingredients (baking mix and Truvia) and stir until just combined and moist.

5. Toss diced strawberries with 1 tsp. baking mix (this helps to prevent them from sinking to the bottom of the muffins).

6. Spoon about a tablespoon of batter into each muffin cup. Top each with approximately 1 tsp. of diced strawberry mixture. Spoon remaining batter evenly over strawberries. Place 1 strawberry slice on top of each muffin.

7. Bake for 16-19 minutes or until muffins spring back when touched lightly in the center. Let muffins cool in pan 5 minutes before removing.

Nutrition Information--approximately 75 calories per muffin

Wednesday, November 9, 2011

Chicken Marsala

Classic Cuisine
This legendary Italian dish is composed of succulent chicken breasts enveloped in a wine and mushroom sauce. The original version uses Marsala wine obviously but any sweet red wine will work fine. This version, developed by Rocco DiSpirito, takes a much healthier approach by eliminating all the butter and the majority of the fat. Don't fret though, he uses clever tricks like adding Greek yogurt to retain all the flavor and essence of Chicken Marsala.

Chicken Marsala
Gluten Free
Serves 1

4 oz. chicken breast, pounded thin
2 tbsp + 1 tsp. gluten free flour
2 tbsp egg substitute
4 oz mushrooms (5-6 mushrooms), sliced thin
1 garlic clove, minced
2 tbsp red wine
1 tbsp. fat free Greek yogurt
1/4 cup low sodium chicken broth
salt & pepper

1. Heat a medium nonstick skillet over medium-low heat. Once pan is hot, spray with nonstick spray.

2.  Place 2 tbsp. flour in a shallow dish and egg substitute in another shallow dish. Dredge chicken in first flour, then egg, being sure to coat it completely.

3. Add chicken to skillet and coat until golden brown on both sides, about 5-6 minutes total. Transfer chicken to a plate and tent with aluminum foil to keep warm.

4. Wipe out skillet with a paper towel and respray with nonstick spray. Return pan to stove and raise heat to high.

5. Once pan is hot, add mushrooms. Cook, without stirring for 3 minutes to allow mushrooms to brown.

6. When mushrooms are golden brown, add garlic and season with salt. Cook, until garlic is fragrant, about 1 minute.

7. Stir remaining 1 tsp of flour into mushrooms. Add in the wine and chicken broth, and bring the sauce to a simmer.

8. Simmer until the sauce has the consistency of gravy, about 3 minutes.

9. Remove pan from the heat. Stir in the yogurt, and season with salt and pepper. Spoon mushroom mixture over the chicken, and serve.

Nutrition Information--approximately 243 calories, 4g fat, 34g protein

Monday, November 7, 2011

Ginormous Gingerbread Waffle

Waffle Wonderland
The past few days I have been pondering the idea of making some sort of waffles and then today a holiday ad reminded me of making gingerbread houses. Hence, Ginormous Gingerbread Waffles were born. Adding the  fresh ginger to the batter adds a nice kick to these spicetastic waffles. Feel free to get creative and build a few gingerbread houses!

Ginormous Gingerbread Waffle
Gluten Free
Makes 1 Large Waffle

Ingredients--
1 tsp. fresh ginger, grated

1/4 tsp. Truvia

1/3 cup gluten free Bisquick mix
1/2 cup pumpkin puree
2 tbsp. sugar free maple syrup
1 tbsp. water
1 tsp. brown sugar
1/4 tsp. cinnamon
1/4 tsp. nutmeg
dash of cloves
1/4 tsp. pure vanilla extract

Optional-- more maple syrup for drizzling on top & fat-free Reddi-Whp

1. Spray a waffle iron well with nonstick spray and heat to waffle setting.

2. In a small dish, mash together ginger and Truvia with a fork until a paste is formed.

3. Stir together Bisquick and pumpkin puree in a separate small bowl until thoroughly combined.

4. Add in ginger paste, and remaining ingredients (except optional topping). Stir well.

5. Pour batter into center of waffle iron and close lid.

6. Cook 5-7 minutes (time will vary based on waffle iron), until waffle is cooked through and there is no longer steam.

7. Top with optional garnishes if desired.

Sunday, November 6, 2011

Personal Apple Pies

Apple Pie a Deux
In the spirit of the Thanksgiving season, I decided to revamp a Hungry Girl Apple Pie recipe into something that's miniature and gluten free. I don't know about you but I normally don't have 8 people around to eat a huge pie so this a convenient and easy alternative.The Personal Apple Pie recipe is a little longer than my usual recipe but its worth a little extra time for this gooey apple delight.

Personal Apple Pies
Gluten Free
Serves Two


Crust:
1 cup corn Chex
1/4 cup cinnamon Chex
2 tsp. Truvia
1/2 tsp. cinnamon
2 tbsp. Promise butter spread
2 tsp water

Filling:
1 large Granny Smith apple
1/3 cup cold water
1 tbsp. brown sugar
1.5 tsp. cornstarch
1/2 tsp. lemon juice
3/4 tsp. cinnamon
1/8 tsp. nutmeg
1/8 tsp. vanilla
dash of salt
Fat Free Reddi -Whip, for topping

1. Preheat oven to 350 degrees. Spray 2 mini pie dishes with nonstick spray (if you are using dark coated pans turn down oven 25 degrees) and set aside.

2. To make the crust, place corn Chex and cinnamon Chex in a small food processor or blender. Grind to a breadcrumb-like consistency. Transfer to a small bowl.

3. Add Truvia and cinnamon and mix well. Set aside

4. In a small dish, combine Promise with water. Microwave 10-15 seconds or until butter melts. Whisk until mixture is smooth and evenly incorporated.

5. Pour butter mixture into cereal mixture and stir until thoroughly combined and a dough begins to form.

6. Use your spoon to mark dough into two even sections (use one section for each pie dish).

7. Take a small piece from one portion of dough and press onto bottom of pie plate with your hands so it forms a thin layer. Grab another small piece and press along side of pie plate. Continue adding small sections of dough until, pressing them into place, until you've covered the entire pie dish. Use your fingers to even out dough. Repeat entire procedure with second pie plate.

8. Bake crust in the oven for 7-8 minutes, or until crust begins to pull away slightly from pie plate. Set aside to cool.

9. Raise oven temperature to 375 degrees.

10. Peel, core, and thinly slice apple.

11. In a medium nonstick pot, combine all filling ingredients except apples and Reddi-Whip (don't turn on stove yet). Add 1/3 cup cold water and mix until ingredients have dissolved.

12. Stir in apples and bring to medium high heat. Cook, stirring frequently, until liquid has thickened (don't worry, it will thicken!) and apples have softened, 12-15 minutes.

13. Carefully spoon apples into prepared pie crusts. Bake in the oven until apples are very tender, 24-26 minutes.

14. Serve directly in pie dishes garnished with a dollop of Reddi-Whip.

Saturday, November 5, 2011

Royal Risotto Italiano

The King Reigns Again
I've already done a couple of risotto recipes for Spicy Sweet Potato, however, since risotto is the king of creamy, comfort food you can never have enough recipes for it. This particular risotto variation is overflowing with  flavorful vegetables that are cooked with various methods to maximize their individual flavor. These vegetables, including slow roasted eggplant,oven-dried tomatoes, and braised mushrooms, marry with the luscious risotto to produce absolute perfection.

Royal Risotto Italiano
Gluten Free
Serves 4


Ingredients--
6 cups low sodium chicken broth (or vegetable broth to make a completely vegetarian version)
1 tbsp olive oil
2 cloves garlic
1 cup arborio rice
1 cup sliced mushrooms
1 pint grape tomatoes

1 medium eggplant
3/4 cup + 4 tsp shredded Parmigiano Reggiano cheese
salt and pepper

1/2 tsp Italian seasoning
a few sprigs of fresh basil,chopped
a few drizzles of balsamic vinegar


Preheat oven to 400 degrees. Line a large baking sheets with aluminum foil and spritz with nonstick spray.


Cut eggplant in half width wise so you have two separate sections of eggplant. Peel one section, dice into cubes, and place on baking sheet. (Save other half of eggplant for another use).


Add tomatoes to baking sheet. Spray vegetables with nonstick spray and season with Italian seasoning, salt, and pepper. Place in oven and roast 35-38 minutes (until eggplant pieces are tender and tomatoes begin to burst). Once roasted, remove from oven and set aside until ready to use.

Meanwhile, heat broth in a saucepan until boiling, then reduce to simmer. Maintain simmer.

Heat 1 tbsp olive oil in large saucepan over medium high heat. Add garlic and cook until fragrant about 30 seconds.

Add rice and cook about one minute, stirring until rice is thoroughly coated with oil.

Add mushrooms and a ladleful of broth and cook, stirring until most of the liquid is evaporated, 2-3 minutes.


Add 1 cup of broth and cook, stirring until most of the liquid is evaporated, 2-3 minutes.

Continue to add broth 1/2 cup at a time, stirring until liquid is almost evaporated after each addition. Keep adding broth until rice is creamy but still al dente (18-20 minutes).The majority of the broth should be used up.

Stir in roasted eggplant, roasted tomatoes, 3/4 cup cheese, salt, and pepper. Cook 1-2 minutes until heated through. 


Divide risotto among 4 bowls and top each with 1 tsp cheese, fresh basil, and a few drizzles of balsamic vinegar.

Thursday, November 3, 2011

Sweet Potato Chili

Chili Con Carne
Time to break out the slow cooker and make this delightful  sweet potato chili. It is almost reminiscent of a Mole sauce with a sprinkling of chili and cocoa spices mixed in with the sweet potatoes, peppers and black beans. The recipe utilizes the slow cooker so it can be prepared in the morning and then enjoyed at dinner time. Plus it's basically  fool-proof since there's no meat that needs to be carefully monitored.

Sweet Potato Chili
Gluten Free
Serves Two


Ingredients--
1 large sweet potato, cut into 3/4 inch cubes
1 small onion, chopped
1/2 green bell pepper, chopped
1/2 cup black beans, drained and rinsed
1 garlic clove, minced
1/2 cup diced tomatoes, drained
1/4 cup crushed tomatoes
1 cup low-sodium chicken broth
1 tsp unsweetened cocoa powder
2 tsp chili powder
1/2 tsp cumin
1/8 tsp cayenne
1/8 tsp salt
Optional Garnish: hot sauce, cheddar cheese, or fresh cilantro

1. Coat slow cooker with nonstick cooking spray.

2. Add all ingredients to slow cooker.

3. Combine well with a large spoon.

4. Cover and cook on high or 4-5 hours or low for 7-8 hours (until vegetables are tender).

5. Garnish with desired ingredients. Serve over rice, noodles, or on it's own.


Wednesday, November 2, 2011

Eggs In Hell

Devilish Delight
Here's an adaption of an egg recipe I saw Mario Batali make on The Chew. It uses quintessential Italian ingredients like fresh basil and garlic to make a simple and scrumptious one-skillet meal . The chili flakes had a spicy kick hence the name.

Eggs In Hell
Gluten Free
Serves 1


Ingredients--
1/4 of a medium onion, diced
1 garlic clove, minced
2 tbsp. green bell pepper, diced
1/8 tsp. crushed red pepper flakes (add more depending on your desired spiciness)
3/4 cup crushed tomatoes
2 eggs
1 tsp. Parmesan cheese, grated
salt and pepper
Fresh basil to garnish, shredded

1. Spray a medium skillet with nonstick spray and heat over medium heat.

3. Add onion, garlic, bell pepper, and crushed red pepper. Cook until softened, stirring occasionally, about 7 minutes.

4. Pour in crushed tomatoes and bring to a boil and then immediately reduce heat to a simmer.

5. Carefully crack eggs, one at a time, into tomato sauce. Season with salt and pepper.

6. Cook until eggs are cooked to your liking, 5-9 minutes.

7. Remove pan from heat and sprinkle with Parmesan and basil. Let cool for 1-2 minutes prior to serving.