Pages

Foodie Blogroll

Thursday, December 20, 2012

Teriyaki Eggplant Steaks

Some of the best recipes are the simplest ones and Teriyaki Eggplant steaks certainly falls into that category ! Eggplant "steaks" are marinaded for a few minutes in teriyaki sauce before being broiled until tender and caramelized. Finish the eggplant  with a sprinkle of sesame seeds and you have a quick and flavorful dish that's perfect for those days when you have no time to spare.

Teriyaki Eggplant Steaks
Gluten Free
Serves Two
Click Here for Printable Recipe


Ingredients-
1 medium eggplant, cut into 1/2 inch circles
1 recipe Gluten Free Teriyaki Sauce*
Salt, to taste
Optional Garnish--sesame seeds

1. Place eggplant slices in a large casserole dish and season with salt. Prick slices with a fork a few times to allow the teriyaki marinade to soak through. Pour marinade over eggplant, turning slices to ensure that they are coated on all sides.

2. Let eggplant marinade for 15-30 minutes, flipping slices halfway through marinade time.

3. Line a large rimmed baking sheet with aluminum foil. Place a cooling rack over baking sheet and spray with nonstick spray. (This will help the eggplant cook evenly but if you don't have a cooling rack that will fit in your baking sheet, simply spray foil and place eggplant slices directly on foil lined baking sheet).

4. Preheat broiler to high.  Remove eggplant slices from marinade (save the marinade) and place in a single layer on prepared baking sheet. Brush the tops of the eggplant with the marinade.

5. Place eggplant steaks under broiler until golden on the top, about 2-3 minutes (watch carefully!).

6. Remove baking sheet from oven and carefully flip eggplant slices. Brush tops with a layer of teriyaki marinade. Return to oven and broil until eggplant is tender and golden on all sides, 2-4 minutes more.

7. Plate eggplant slices on 4 serving plates. Brush with a final layer of teriyaki marinade. Sprinkle with a dash of sesame seeds, if desired.

Nutrition Information--approximately 160 calories per serving ( 1/4 of the recipe)

*Gluten Free Teriyaki Sauce Recipe -- http://spicysweetpotato.blogspot.com/2012/12/gluten-free-teriyaki-sauce.html


Wednesday, December 19, 2012

Gluten Free Teriyaki Sauce

Teriyaki sauce is a quick and simple way to add delicious flavor to a wide variety of foods. Unfortunately, almost any bottled teriyaki sauce contains soy sauce and thus isn't gluten free. While there now a few gluten-free brands, many of them seem to have left out the flavor!  Luckily, this homemade teriyaki sauce is quite delicious and only requires a few items. Simply let the ingredients simmer and combine for a few moments and you have a terrific gluten free teriyaki sauce!

Gluten Free Teriyaki Sauce
Makes approximately 1 cup
Click Here for Printable Recipe

Ingredients--
1/2 cup mirin (can be found in the Asian section of large supermarkets or specialty grocery stores)
1/2 cup gluten free soy sauce
1/4 cup granulated Truvia

1. Combine all ingredients in a small saucepan. Cook over medium low heat, stirring occasionally, until Truvia dissolves, 5-8 minutes. The sauce can be made ahead of time and stored in a sealed container in the refrigerator until ready to use.

Nutrition Information--approximately 35 calories per tablespoon

Tuesday, December 18, 2012

Baked Applesauce

I first saw Baked Applesauce on ElanasPantry.com and wondered why I never thought of it myself! It's so simple and delicious, you will never make applesauce on the stove again. The recipe can also easily be altered to serve more people by simply using a larger baking dish and more apples (The original recipe used 12 apples). If you need something to serve with your applesauce, try these scrumptious latkes--
http://spicysweetpotato.blogspot.com/2012/12/butternut-squash-latkes.html

Baked Applesauce
Gluten Free
Serves One


Ingredients--
1 apple, peeled, cored, and thinly sliced
1 cinnamon stick
1 Truvia packet

1. Preheat oven to 350 degrees. Spray a small baking dish with nonstick spray.

2. Place apple slices, cinnamon stick, and Truvia in baking dish and toss to combine.

3. Cover dish with aluminum foil and bake until apples are falling apart and tender, about an hour and 15 minutes.

4. Discard cinnamon stick, then use a potato masher or back of a spoon to mash apples to desired consistency. That's it!

Nutrition Information-- approximately 100 calories per serving


Monday, December 17, 2012

Butternut Squash Latkes

Hannukah may be over for the year but that doesn't mean you can't enjoy crispy, golden latkes. In this recipe from Hungry Girl, the usual potato is swapped out for sweet and flavorful butternut squash. These latkes also break tradition by being baked instead of fried, which yields a healthier but still scrumptious result. With latkes this tasty, you will be enjoying them all year long!

Butternut Squash Latkes
Gluten Free
Serves One

Ingredients:
3/4 cups shredded butternut squash (a box grater works well)*
1 tablespoon liquid egg substitute
1.5 tsp. gluten free flour
 blend or gluten free all purpose flour
1/8 tsp. garlic powder
Salt, to taste
Plus any desired toppings, such as applesauce


1. Line a baking sheet with aluminum foil and place in the oven. Preheat oven to 450 degrees.

2. Place shredded squash on a clean kitchen towel and roll up tightly to remove any excess moisture.

3. In a small bowl, combine squash, egg substitute, flour, garlic powder and salt. Mix well.

4. Carefully remove the hot baking sheet from the oven. Cover sheet evenly with a 3-second spray of olive oil spray.

5. Spoon squash mixture onto the sheet in 3 evenly spaced mounds. Using the back of a spoon, flatten and spread each mound into a circle about 3 inches wide.

6. Carefully (don't forget that it's hot!) return pan to the oven and bake for 8 minutes.

7.  Remove baking sheet from oven. Coat the top of the latkes with another 3-second spray of olive oil spray. Gently flip with a spatula.

8. Return latkes to the oven and bake for about 8 minutes more, or until both sides of latkes are crispy.

9. Top latkes with any desired toppings and enjoy.

Nutrition Information--approximately 85 calories per serving (entire recipe)

* If time permits, shred your butternut squash the day before, and store, covered, in the refrigerator until ready to use. This will help dry out the squash to produce the crispiest latkes possible.


Thursday, December 13, 2012

Gingerbread Pancakes

Gingerbread Pancakes, adapted from DailyGarnish.com, are fluffy and flavorful pancakes that make the perfect holiday breakfast. These quick pancakes are a step up from the average pancake thanks to the addition of "gingerbread" spices.  If you really want to make this a festive breakfast, use holiday cookie cutters to cut out the cooked pancakes!

Gingerbread Pancakes
Gluten Free
Makes 12 Pancakes (Serving Size= 3-4 pancakes)


Ingredients--
1 cup gluten free flour blend
2 tablespoons granulated Truvia sweetener
3/4 teaspoons baking powder
1/2 teaspoon baking soda
3/4 teaspoon  allspice
1/2 teaspoon cinnamon
3/4 teaspoon ground ginger
1/2  teaspoon freshly grated nutmeg
1/4 teaspoon salt
1/2 cup pumpkin puree
1/4 cup liquid egg subsitute
1 tablespoon apple cider vinegar
1.25 cups unsweetened original almond milk
2 tablespoons maple syrup
1/2 tsp. pure vanilla extract

1.In a large mixing bowl stir, together flour, Truvia, baking powder, baking soda, spices (allspice, cinnamon, ginger, nutmeg) and salt. Stir until ingredients are combined.

2.  In a separate mixing bowl, combine the wet ingredients- pumpkin, egg, apple cider vinegar, milk, maple syrup, and vanilla. Whisk mixture until all ingredients are evenly combined.

3. Add the pumpkin mixture into the flour mixture, and stir together until combined.

4. Preheat a large nonstick skillet over medium heat and spray with nonstick spray.

5. Once the skillet is hot, use a 1/4 cup measuring cup to ladle batter into skillet and form 4-5 pancakes (as many as you can fit in the skillet at a time). Let pancakes cook until bubbles start to appear on the surface, (2-4 minutes), then carefully flip them. Continue cooking pancakes, about 2 minutes more, or until they are golden brown on both sides.

6. Transfer cooked pancakes to serving dish. Remove skillet from heat briefly to respray with nonstick spray then return to stove top. Repeat Step 5 to create 2 more batches of pancakes or until batter is gone.

7. Serve pancakes with any desired toppings!

*Note- Pancakes can easily be made ahead of time and refrigerated until ready to eat. Simply place cooked pancakes in between layers of wax paper in a tupperware container. Reheat prior to serving using a microwave, oven, or toaster, until warmed through.


Nutrition Information--approximately 53 calories per pancake


Wednesday, December 12, 2012

Creamy Mushroom Bisque

Creamy Mushroom Bisque is a dreamy and luxurious bisque that amazingly contains no actual cream or even dairy products. This silky smooth soup, adapted from http://kblog.lunchboxbunch.com uses  a cauliflower puree to create the a thick and flavorful base for the soup. Once the roasted mushrooms and fresh herbs are added in, you have the perfectly rich yet healthy mushroom bisque!

Creamy Mushroom Bisque
Gluten Free
Serves Four

Ingredients--
Roasted mushrooms:
8 ounces baby bella mushrooms, quartered
8 ounces portobella mushrooms, stems removed, gills removed, and diced (about 2 large)
6 ounces shiitake mushrooms, stems removed and quartered
2 Tbsp extra virgin olive oil
1 Tbsp apple cider vinegar
salt &  pepper (to taste)
4 sprigs of rosemary, leaves removed and chopped
1 tsp. dried thyme
dash of cayenne, to taste
Soup:
1 medium cauliflower head, core and leaves removed
1.5 cups water
4 cups mushroom broth, divided
1.5 cups unsweetened almond milk
2 sprigs fresh rosemary, leaves removed and chopped + a few sprigs for garnish
1 tsp. dried thyme
dash of cayenne, to taste
salt & pepper, to taste
1 tbsp. fresh parsley, chopped + a few sprigs for garnish


Directions:

1. Preheat oven to 425 degrees. Line a large rimmed baking sheet with aluminum foil and spray with nonstick spray.

2. Place the mushrooms on the baking sheet and toss with the oil, vinegar, rosemary and spices. Once mushrooms are evenly coated, arrange in a single layer on the baking sheet.

3. Transfer mushrooms to oven and roast at 425 degrees for about 15 minutes. Stir mushrooms, and continue roasting 15-20 minutes or until they are tender and beginning to caramelize.

4. While mushrooms are roasting, begin steaming the cauliflower. Add water to a  medium pot and bring to boil. Season with water salt then add the whole cauliflower head, cover with a lid, and steam until tender, 8-9 minutes. Drain and break until florets. Set aside.

5. Add the cauliflower and about 2 cups of mushrooms broth to a large pot. Use an immersion blender to puree until smooth (or transfer ingredients to a regular blender).

6. Add in the roasted mushrooms (leave out a few for garnishing, if desired), 1 cup of broth, and the milk.  Puree until smooth then stir in rosemary, thyme, cayenne, salt, and pepper, to taste.

7. Place soup over medium high heat, and bring to boil, stirring frequently. Reduce heat to medium low, and let soup simmer until warmed through, 10-15 minutes. Stir occasionally.

8. While the soup is simmering, you can adjust the seasonings and thickness, if necessary. Taste the soup for seasoning and add more to taste. If soup seems too thick, add remaining 1 cup of broth, 1/4 cup at a time.

9. Just before serving, stir the fresh parsley into the soup.

10. Divide soup between 4 serving bowls and garnish with leftover mushrooms, fresh parsley and rosemary.

Nutrition Information--approximately 190 calories per serving (1/4 of the recipe)


Wednesday, December 5, 2012

Saffron & Squash Risotto

Saffron & Squash Risotto, inspired by a recipe from Rachael Ray magazine, is yet another scrumptious variation of risotto. This risotto has an exotic saffron-infused broth, roasted butternut squash, and creamy pumpkin to create a delectable dish that will have you scraping your bowl clean. Saffron is quite pricey, but since there is really no substitute, it's worth it every now and then.

Saffron & Squash Risotto
Gluten Free
Serves 4


Ingredients--
1 large butternut squash (about 1.5 lbs), peeled and diced
1/2 tsp chili powder
5 and a 1/2 cups low-sodium chicken broth
a generous pinch saffron (16-20 threads)
1 tablespoon extra virgin olive oil
1/2 small onion, finely diced
1 large cloves garlic, minced
salt and pepper
dash of freshly ground nutmeg
1 cups arborio rice
3/4 cup pumpkin puree

1. Preheat oven to 375 degrees. Line a large baking sheet with aluminum foil and spray with nonstick spray.

2. Add squash to baking sheet and spray with nonstick spray. Season with chili powder, salt and pepper, to taste. Use your hands to mix squash cubes until they are evenly coated in spices. Spread out in a even layer.

3. Roast squash 35-40 minutes, or until tender and golden, stirring halfway through cooking. Once squash are cooked through, remove from oven and set aside.

4. While the squash is roasting, place the broth and saffron in a medium pot and bring to a low boil. Reduce heat to low and keep warm.

5. Meanwhile, heat the olive oil in a large saucepan over medium heat. Add in the onion and garlic; season with salt, pepper, and nutmeg. Saute until onion is beginning to soften, 4-5 minutes.

6. Stir in rice, and cook for 1 minute. Add a ladleful of warm broth and cook, stirring often, until the liquid is absorbed.

7. Continue adding stock, a ladleful at a time, and stirring until it is absorbed. Cook rice for 18-22 minutes from the first addition of stock, or until tender and creamy (the majority of the stock should be added).

8. Once rice is fully cooked reduce heat to low then  stir in pumpkin puree, and roasted squash. Season to taste with salt and pepper. Continue cooking just until pumpkin and squash are heated through, stirring constantly.

9. Ladle into shallow bowls and enjoy!

Nutrition Information--approximately 275 calories per serving


Tuesday, December 4, 2012

Protein Packed Veggie Chili

On a cold day, nothing tastes better than a steaming bowl of chili, however, most chili recipes serve a crowd of people which can be an issue if you're only cooking for a few people and not a fan of leftovers. That's why I decided to adapt this delicious vegetarian chili from Candice Kumai, to be a single serving recipe (but it can also be doubled to serve two people). This warm and hearty dish features tofu and lentils in a tasty  and simple take on chili. Cornbread make the perfect accompaniment to this recipe so be sure to serve a piece on the side.*

Protein Packed Veggie Chili
Gluten Free
Serves 1


1/2 tsp. canola oil
1/4 of a green bell pepper, finely chopped
3 oz. lite firm tofu (like the kind by Mori-Nu)
1 garlic clove, minced
1.5 tsp. chili powder
1/4 tsp. cumin
dash of cayenne pepper (adjust according to heat preference)
1 bay leaf
1/4 tsp. salt
Freshly ground black pepper, to taste
1 cup fire roasted diced tomatoes, not drained
1/4 cup canned lentils

Optional Toppings-
Nonfat Plain Greek Yogurt
Scallions, chopped

1. Heat the canola to a small pot to medium.

2. Add in the bell pepper, and cook, stirring occasionally, until pepper has softened, 5-8 minutes.

3. Use paper towels to thoroughly dry tofu, then use a fork to crumble it into small pieces. Add tofu, garlic, chili powder, cumin, cayenne, bay leaf, salt and pepper into the pot. Cook, stirring often, just until garlic is fragrant, about 1 minute.

4.  Stir in diced tomatoes (with their juices) then reduce heat to low, and cook chili, covered, until it has thickened, about 45 minutes. Stir chili from time to time while it is cooking.

5. Add in the lentils , and cook until they are warmed through, about 5 minutes. Taste chili, and adjust seasoning, if necessary.

6. Transfer chili to serving bowl and garnish with toppings, if desired.

Nutrition Information--approximately 172 calories per serving (entire recipe, not including toppings)

Spicy Sweet Potato Cornbread Recipes:

http://spicysweetpotato.blogspot.com/2012/02/perfect-companion-for-chili.html
http://spicysweetpotato.blogspot.com/2012/08/jalapeno-cornbread-muffins.html
http://spicysweetpotato.blogspot.com/2012/10/pumpkin-spice-cornbread.html


Monday, December 3, 2012

Curried Eggplant & Lentil Burgers

Curried Eggplant & Lentil Burgers are some of the best veggie burgers I've ever tasted (and I've made quite a few!). The burgers were adapted from a recipe posted on Blog.FatFreeVegan.com and are composed of a delightful mixture of roasted eggplant, lentils, and spices.


Curried Eggplant & Lentil Burgers
Gluten Free
Makes 6 Burgers


Ingredients:
1 large eggplant
3/4 cup quinoa flakes
2 cloves garlic cloves, minced
1 cup canned lentils
1 teaspoon curry powder
1/2 teaspoon ground cumin
1/4 teaspoon ground coriander
1/2 teaspoon ground paprika
1/2 teaspoon chili powder
2 teaspoons gluten free cornstarch
1/2 teaspoon salt (or to taste)
1/2 teaspoon agave nectar (or honey)

Optional Toppings:
Tomato Slices
Dijon Mustard
Lettuce, for topping or wrapping
Gluten Free Bread or Buns
Any Other Preferred Burger Condiments

1. Preheat oven to 425 degrees.  Line a large baking sheet with parchment paper.

2. Cut off the eggplant stem then cut it in half lengthwise. Spray eggplant flesh with nonstick spray and season with salt. Place eggplant flesh side down on a baking sheet.

3. Bake for 25 minutes or until the eggplant is completely tender when poked with a fork. Transfer to a plate and allow eggplant to cool completely.* Leave oven on at 425 degrees.

4. Once the eggplant is cool, scoop out the flesh into a food processor. Pulse eggplant a few times until it forms a coarse puree then transfer mixture to a large mixing bowl.

5. Add in remaining ingredients- quinoa flakes, garlic, lentils, spices (curry powder, cumin, coriander, paprika,chili powder), cornstarch, salt, and agave. Stir until ingredients are well combined, then allow to stand at room temperature for 20 minutes.

6.  Line a large baking sheet with parchment paper and set aside. Spray a large non-stick  with nonstick spray and heat to medium-high.

7. Use a 1/3 measuring cup to scoop out eggplant mixture, then use your hands to form into a flat patty   about 3-inches wide* and add to hot skillet. Continue scooping out eggplant 1/3 cup at a time and adding patties to pan (You should end up with 6 patties). If your pan isn't large enough to hold all the patties, you can cook them in batches.

8.  Cook eggplant burgers for 3-4 minutes or until lightly browned on the bottom and then carefully flip and cook on the other side until browned, 3-4 more minutes.

9. Use a spatula to transfer burgers to prepared baking sheet. Bake for 15-20 minutes, or until burgers are slightly crisp and cooked through.

10. Plate burgers and top with any desired toppings.


Nutrition Information--approximately 125 calories per burger (with no toppings)

Make Ahead Options--

-You can roast eggplant a few days ahead of time (Stop after step #3 and turn oven off) and then simply store in a covered container in the refrigerator until ready to use.

- You can also form the eggplant patties ahead of time, and place in a parchment lined tupperware container. (Stop after Step 7 and place formed patties in container instead of skillet). Store burgers in the refrigerator until ready to use (up to 5 days). Once ready to cook, let sit at room temperature for 5 minutes, then continue with cooking process (sear in skillet, then bake).


Thursday, November 29, 2012

Pomegranate Glazed Mahi Mahi

Pomegranate Glazed Mahi Mahi is a fantastic entree that is both festive and unique. In this dish, adapted from SayWhatYouNeedToSayBlog.com, an easy pomegranate and balsamic reduction creates a delicious marinade for fresh mahi-mahi filets. The mahi is basted with more of the scrumptious sauce while baking. then topped with fresh pomegranate seeds for the perfect finish.

Pomegranate Glazed Mahi Mahi
Gluten Free
Serves Four


Ingredients--
Marinade:
1/2 cup POM juice
1/4 cup balsamic vinegar
2 tbsp. honey
2 tsp. brown sugar
2 tbsp. Dijon
2 tsp. lime juice

1 lb. mahi-mahi filets
1 cup pomegranate arils (seeds),
salt and pepper, to taste

1. Combine all of the marinade ingredients in a small saucepan and, bring to a boil over medium-high heat while stirring frequently. Reduce heat to medium and let marinade reduce for 15 minutes, stirring occasionally.

2. Remove saucepan from heat and let marinade cool and thicken for 10 minutes.

3. Spray a  casserole dish (large enough to hold the fish) with nonstick spray. Season mahi with salt and pepper on both sides, then place in casserole dish.

4. Once the marinade is cool, pour over mahi, ensuring that it is coated on all sides. Let marinade for about 20 minutes.

5. Preheat oven to 400 degrees.

6. Transfer fish to oven and bake for 20-25 minutes, or until fish is nearly cooked through. Baste fish with sauce every 10 minutes.

7. Remove mahi from oven and turn on broiler. Top each piece of fish of 1/4 cup of pomegranate arils and baste with additional sauce. Broil for 3-5 minutes or until fish is cooked to desired doneness.

Nutrition Information--approximately 225 calories per serving


Wednesday, November 28, 2012

Veggie Sloppy Joes

Veggie Sloppy Joe's are a delectable vegetarian version of the traditional, meat-filled Sloppy Joe sandwich. This recipe was adapted from kblog.lunchboxbunch.com and it is packed with tasty vegetables like mushrooms, tomatoes, and peppers. The sandwich also contains the ever versatile Textured Vegetable Protein, which can be found in most major supermarkets and health food stores. TVP is comprised of soy protein and is the perfect meat alternative for the Sloppy Joe's. Try this deliciously messy sandwich today!

Veggie Sloppy Joe's
Gluten Free
Serves Two


Ingredients--
1/4 cup green bell pepper, diced
4-5 cremini or button mushrooms, chopped
1/4 cup  TVP (Textured Vegetable Protein) (I used the kind by Bob's Red Mill)
1/4 cup water
1.5 tbsp. tomato paste
2 tsp. soy sauce
1 tsp. sugar-free maple syrup
1/4 cup diced  fire roasted tomatoes
1/4 cup crushed tomatoes (plus 1-2 tbsp, if necessary)
2+ tsp. jalapeno, seeded and finely diced (use a larger amount and/or seeds for more heat )
1/4  tsp chili powder
1/2 tsp. dried parsley flakes
1/4 tsp. garlic powder
1/4 tsp. liquid smoke
salt and pepper, to taste
4 slices light gluten free sandwich bread (like the kind by Ener-G)

1. Spray a medium skillet with nonstick spray and bring to medium-high heat.

3. Add the bell pepper and mushrooms to pan and saute for 5 minutes.

4. Add in the tomato paste, water and TVP. Stir until TVP absorbs the liquid and thins the paste.

5. Stir in soy sauce, maple syrup, diced tomatoes, crushed tomatoes, and jalapeno. Add in spices (chili powder, parsley, and garlic powder) and season mixture with salt and pepper

6. Reduce heat to medium low and continue cooking sloppy joe mixture  for about 5 minutes, or  until it  thickens, stirring from time to time. If mixture becomes dry, add additional crushed tomatoes. Add in liquid smoke, and taste for seasoning.

7. Toast bread slices then divide Sloppy Joe mixture between two of the bread slices. Top with the two remaining slices to form two sandwiches and enjoy!

Nutrition Information--approximately 225 calories per serving (1 Sloppy Joe Sandwich)


Tuesday, November 27, 2012

Spaghetti & Mushroom Meatballs

Believe it or not, Spaghetti & Mushroom Meatballs actually contains no meat but still tastes absolutely amazing. This vegetarian recipe, adapted from KeepInItKind.com, uses mushrooms and lentils  to form scrumptious and flavorful meatballs. The list of ingredients might look a little long but most of the work is done by the food processor. You can also easily prepare them ahead of time for a quick meal- simply refrigerate uncooked meatballs (stop after Step 4) in a covered container until ready to use. When you're ready to eat them, let meatballs sit out a few minutes, then bake and simmer as directed.


Spaghetti & Mushroom Meatballs
Gluten Free
Serves Two


Ingredients:
Meatballs--
4 oz. cremini mushrooms, thinly sliced
2 tbsp. liquid egg substitute
2/3 cup canned lentils, drained
1 garlic clove, minced
2 tsp.  tomato paste
1.5 tsp. gluten free soy sauce
1/2 tsp Liquid Smoke
3/4 tsp dried basil
1/2 tsp dried thyme
1/4 tsp dried sage
a couple dashes of cayenne pepper
salt and pepper, to taste
1/2 cup gluten free bread crumbs
Spaghetti--
1 cup low-fat marinara sauce (such as Classico Tomato & Basil)
2 packages Miracle Noodles
2 tsp. grated Parmesan cheese
Fresh Basil, thinly sliced, to taste


1. Preheat  oven to 350 degrees. Line a baking sheet with aluminum foil and spray with  non-stick spray.

2. Heat a medium skillet to medium high heat and spray with nonstick spray.  Add the mushrooms and  spread them into an even layer. Let mushrooms cook, without stirring, until golden on the bottom, about 3-4 minutes. Stir mushrooms, and  continue to cook until golden on all sides, 3-5 minutes more. Season to taste with salt and pepper, then remove from heat and let cool for a few minutes.

3. Transfer the cooked mushrooms to the bowl of a food processor. Add in the liquid egg, lentils, garlic, tomato paste, soy sauce, liquid smoke, herbs (basil, thyme, sage), cayenne, 1/4 tsp. salt  and 1/4 tsp. pepper. Pulse mixture until it is fairly smooth and all ingredients are combined.

4. Pour breadcrumbs into a shallow bowl, then add the lentil-mushroom mixture and stir until just combined.  Using heaping tablespoonfuls, form little balls with the lentil mushroom mixture and place them on the prepared baking sheet.  You should end up with 10-12 meatballs.

5. Place the baking sheet in the oven and bake for 15 minutes.  Remove baking sheet from oven and carefully flip all of the meatballs (just use your hands to reshape them if they get a little smashed), and return to oven for another 10-15 minutes, until slightly golden on the outside.

6. Once the meatballs are flipped and returned to the oven, begin  preparing the spaghetti.  Place the marinara sauce in a medium saucepan, and bring to a gentle simmer, over medium high heat, stirring often. Reduce heat to low, and let sauce simmer, stirring occasionally.

7.  Drain noodles in a colander and rinse with water. Use paper towels to dry noodles thoroughly, then cut them up into smaller pieces with kitchen shears. Transfer noodles to a medium microwave safe bowl and season with salt and pepper.

8. Microwave noodles for 1 minute. Stir in 2 tbsp. of marinara sauce, cover, and microwave 1 minute more.

9. Once meatballs are finished baking, add them to the simmering sauce. Stir to fully coat all of the meatballs, then raise heat to medium- low and continue to cook meatballs for about 5 minutes, stirring occasionally.

10. Divide noodles between two serving plates. Top each plate of noodles with 5-6 meatballs, then spoon remainder of sauce on top. Finish each plate with 1 tsp. of parmesan cheese and fresh basil, to taste.

Nutrition Information--approximately 205 calories per serving


Monday, November 26, 2012

Quinoa and Crab Stuffed Red Peppers

Quinoa and Crab Stuffed Red Peppers is an amazing recipe Candice Kumai, that adds a punch of spice and flavor to ordinary stuffed peppers. In this delicious dish, the peppers are roasted until tender before being stuffed with a delectable filling of quinoa, crab, tomatoes, and spices. To make this meal even quicker, you can prepare the quinoa ahead of time and store in the fridge until ready to use.
Quinoa and Crab Stuffed Red Peppers
Gluten Free
Serves 6

Ingredients--

1 cup quinoa
2 cups low sodium chicken broth
1 1/2 tablespoons extra-virgin olive oil, divided
2 garlic cloves, minced
8 ounces lump crabmeat
1 cup crushed tomatoes
1/4 cup fresh basil leaves, stacked, rolled, and sliced crosswise into thin strips
2 tsp. Old Bay Seasoning
1 teaspoon sea salt
1/4 tsp. freshly ground black pepper
3 red bell peppers, halved lengthwise and seeds removed

1. Bring chicken broth to a boil in a medium saucepan then stir in the quinoa. Reduce the heat to low and simmer, covered, until the quinoa is tender and has absorbed the liquid, about 20 minutes. Scrape the quinoa into a large bowl to cool slightly.


2. Preheat the oven to 375°F. Spray a 9x13  casserole dish with nonstick spray.


3. Coat the insides of the pepper halves with 1 1/2 teaspoons of the oil and arrange, cut side up, in the prepared baking dish. Season with 1/2 teaspoon  of salt. Roast until just tender, about 25 minutes.

4. Meanwhile, heat 1 tablespoon of the olive oil in a medium skillet over medium-low heat. Add the garlic and cook until fragrant, about 1 minute. Stir in the crabmeat and crushed tomatoes and cook until warmed through, about 2 minutes. 


5. Remove from the heat and stir in the cooked quinoa, basil, Old Bay, the remaining 1/2 teaspoon of the salt, and black pepper.

6. Remove the pan from the oven and place on a heatproof work surface. Mound 1/2 cup of the quinoa mixture in each pepper half and return to the oven.

7. Roast until the peppers are soft and fragrant and the quinoa mixture is hot, about 15 minutes. Serve hot.


Nutrition Information--approximately 215 calories per serving  (1 stuffed pepper half)


Monday, November 19, 2012

Balsamic Orange Brussels Sprouts & Cranberries

Are you in desperate need of one more side for your Thanksgiving meal? If so, then you're luck with this simple and unique side dish adapted from DailyGarnish.com.  Balsamic Orange Brussels Sprouts & Cranberries contains all the usual Thanksgiving flavors but combines them in a nontraditional way to create an interesting new take on brussels sprouts and cranberries. The two ingredients are roasted together and then tossed in a tangy balsamic and orange dressing for a exciting flavor filled side. Even if you already have your Thanksgivning menu set, don't let that deter you from trying this dish. It's the perfect accompaniment to any meal and a great way to take advantage of seasonal produce.

Balsamic Orange Brussels Sprouts & Cranberries
Gluten Free
Serves Four


Ingredients--
18-22 Brussels sprouts
6 ounces fresh cranberries (about1/2 of the average sized bag)
1 tsp. olive oil
Salt, to taste
dash of sugar
Dressing:
3 tablespoon balsamic vinegar
1 tablespoon olive oil
1/2 teaspoon salt
Juice of one orange
Zest of one orange

1. Preheat oven to 375 degrees. Line a baking sheet with aluminum foil and spray with nonstick spray.

2. Add Brussels sprouts and cranberries to pan and drizzle with olive oil. Season with salt, than use your hands to  mix ingredients before spreading them into an even layer.

3. Roast Brussels sprouts and cranberries, until sprouts are golden and tender, and cranberries begin to burst,  25-30 minutes, stirring halfway through cooking.

4. Meanwhile, whisk together dressing ingredients in a small dish.

5. Once sprouts and cranberries are finished roasting, remove from oven and transfer to serving bowl. Sprinkle with a dash of sugar, then drizzle with the dressing and toss to coat. Taste for seasoning, and add additional salt or sugar, if necessary.

Nutrition Information--approximately 110 per calories ( 1/4 of the recipe)


Friday, November 16, 2012

Mushroom Timbales

 Not sure what exactly a timbale is? Don't worry, I didn't know either prior to making this recipe . The general consensus among  online dictionaries is that a timbale is a custard-like dish composed of  meat or vegetables  and baked in a mold. However, no matter, how you define timbale, this elegant dish adapted from Blog.FatFreeVegan.com is the the perfect elegant side dish for any holiday dinner party. In this version of timbales, a creamy mixture of mushrooms, lentils, and herbs is baked in individual ramekins to create an impressive yet easy side dish.

Mushroom Timbales
Gluten Free
Serves  4

Ingredients--
4 slices light gluten free sandwich bread
2 cups cremini mushrooms, quartered (about 10 large)
1/2 cup light firm silken tofu (like the kind by Mori-Nu)
3 cloves garlic, quartered
2 tbsp. soy sauce
2 tbsp. balsamic vinegar
1 cup canned lentils, drained and rinsed
1 tablespoon tomato paste
2 tsp. minced fresh rosemary
1/2 teaspoon dried thyme
1/2 teaspoon rubbed sage
3 tablespoons gluten free cornstarch
1 teaspoon salt
1/4 tsp. freshly ground black pepper
sliced mushrooms for garnish (optional)

1. Preheat oven to 350 degrees. Spray 4 ramekins with cooking spray and set aside. Place one nice-looking mushroom slice in the bottom of each ramekin, if desired (This will show up on the top of the timbale when they are inverted prior to serving).

2. Place the bread in a food processor and pulse until it turns to crumbs. Add the mushrooms, tofu, garlic, soy, and balsamic to food processor and blend until fairly smooth.

3. Add the lentils and process again until smooth. Add the tomato paste, herbs, cornstarch, salt and pepper, and process until well-blended. Taste for seasoning.

4. Divide the mixture among the prepared ramekins and smooth the tops with a spoon.

5. Bake, uncovered, until tops are brown and crusty and middles seem moderately firm when pressed, about 28-35 minutes. Remove from the oven and allow to cool for 10 minutes. Run a thin knife around the edges and invert the ramekins onto serving plates.

Nutrition Information--approximately 165 calories per timbale

Thursday, November 15, 2012

Petite Pumpkin Yogurt Pie

Petite Pumpkin Yogurt Pie is a delightful new twist on the typical pumpkin pie. To create the  pumpkin filling for this individual sized pie, I used creamy Greek yogurt instead of heavy cream or evaporated milk. The yogurt is the perfect healthy alternative as it provides just the right amount of tang and creamy texture to the pie.  I made a quick cinnamon and Chex crust for this recipe but you can also use the tasty filling in another type of gluten free crust.The recipe is written just for one , but you can easily increase the quantities depending on how many guests (or mini pie plates) you have.

Petite Pumpkin Yogurt Pie
Gluten Free
Serves One


Ingredients--
Crust:
1/2 cup corn chex
2 tsp. granulated Truvia
1 tsp. cinnamon
1 tbsp. sugar free applesauce
1 tbsp. sugar free pancake syrup

Pie Filling:
1/3 cup nonfat Greek yogurt
1/4 cup pumpkin puree
1 tbsp. granulated Truvia
1/8 tsp. pure vanilla extract
1 tsp. sugar free pancake syrup
1/4 tsp. cinnamon
1/8 tsp. ginger
1/8 tsp. nutmeg
dash of allspice

Optional Topping--whipped cream

1. Preheat oven to 350 degrees. Spray a mini pie dish with nonstick spray and set aside.

2. To make the crust, place the Chex in a food processor (a mini food processor is the perfect size if you have one) and grind  cereal to a breadcrumb like consistency.

3. Add remaining crust ingredients to food processor and pulse until ingredients are combined and a dough begins to form.

4. Use your hands to press crust into pie plate, starting at the bottom and working your way up the sides. Try to form an even and uniform crust, but it doesn't have to be perfect.

5. Transfer crust to oven, and bake 6-8 minutes, or until crust begins to crisp and pull away from edges of the pan. Remove crust from oven and set aside. Leave oven on at 350 degrees.

6. To make the filling, combine all pie filling ingredients (yogurt, pumpkin, Truvia, vanilla extract, pancake syrup, cinnamon, ginger, nutmeg, and allspice in a small bowl. Stir until ingredients are blended and form a smooth batter.

7. Scoop pie filling into prebaked crust and smooth out the top.

8. Bake pie 25-30 minutes, or until slightly golden on top and heated through. Let pie cool 5 minutes before carefully running a knife along the edges of pie plate to loosen the crust. Once crust appears loosened, use a small spatula to gently transfer pie to serving plate. Top with whipped cream, if desired.


Nutrition Information-- approximately 145 calorie per pie (entire recipe)


Wednesday, November 14, 2012

Eggplant Lentil Chili Mole

Eggplant Lentil Chili Mole, from Isa Chandra Moskowitz,  is an amazing twist on vegetarian chili. Eggplant, lentils, and tomaotes are slowly simmered in a spicy broth infused with cinnamon and cocoa. It might sound a little strange but this combination of spices in quite common in Mexican cooking and the resulting flavor is both exotic and delicious.This is also the perfect make ahead meal since it can easily be stored in a container in the refrigerator and the flavors only intensify with time.

Eggplant Lentil Chili Mole
Gluten Free
Serves Three

Ingredients--
1 pounds eggplant, cut into 3/4 inch cubes
1/2  teaspoon olive oil
1/2 of  red pepper, diced medium
1 clove garlic, minced
1 tsp. water
1.5 teaspoon chili powder
1 teaspoons ground cumin
1 teaspoons ground coriander
1 teaspoons dried oregano
1/4  teaspoon ground cinnamon
1/4 teaspoon salt
1 tablespoons unsweetened cocoa powder
1/2  cup green lentils, washed
2 cups vegetable broth (or chicken broth)
1 cup diced tomatoes
1 teaspoons agave nectar
Parsley, for topping (optional)


1. Add olive oil to a large pot and heat to medium high. Add bell pepper and saute until translucent, 5 to 7 minutes.

2. Stir in garlic and saute for 30 seconds, using cooking spray if it's sticking. Mix in water, chili powder, cumin, coriander, oregano, salt and cinnamon. Add 1/4 cup of the vegetable broth and the cocoa powder; cook for about 1 more minute, while stirring, to dissolve the cocoa.

3. Add lentils, remaining  1 3/4 cup vegetable broth, diced tomatoes and eggplant. Stir to evenly mix all ingredients. Cover pot and bring to a boil, keeping a close eye on it.

4. Once chili is  boiling, lower heat to a simmer and cook,covered, for about 40 minutes, until lentils are tender and eggplant is soft.

5.Mix in agave and taste for salt and seasoning. Serve garnished with parsley, if you like.

Nutrition Information--approximately 220 calories per serving (1/3 of the recipe)


Tuesday, November 13, 2012

Quinoa Stuffing with Brussels Sprouts & Mushrooms

Quinoa Stuffing with Brussels Sprouts & Mushrooms is quite different than the typical stuffing but while it may not be traditional, it is definitely a delicious and naturally gluten free variation. This dish, loosely adapted from a Giada DiLaurentiis recipe, makes the perfect accompaniment for any dinner, not just Thanksgiving. Flavorful and nutritious quinoa is tossed with portobello mushrooms, brussels sprouts, fresh herbs, and balsamic vinegar to form a scrumptious side dish. Plus, if you make the quinoa ahead of time, it comes together in minutes.

Quinoa Stuffing with Brussels Sprouts & Mushrooms
Gluten Free
Serves One

Ingredients--
1/4 tsp. extra virgin olive oil
1 small garlic clove, minced
1 portobello mushroom, diced
8-10 brussels sprouts, root ends removed, then halved lengthwise and thinly sliced crosswise
1 tbsp. fresh thyme, finely chopped
1/2 tbsp. fresh sage, finely chopped
1/3 cup cooked quinoa
1 tbsp. balsamic vinegar
salt and pepper, to taste

1. Add olive oil to a medium nonstick pan and heat to medium-low. Add garlic to pan, and saute until fragrant, about 1 minute.

2. Raise heat to medium-high and stir in portobello mushrooms. Saute mushrooms, until golden and tender, 6-8 minutes.

3. Add brussels sprouts to the pan and saute until tender, but still green in color, about 5 minutes. Season vegetables with salt and pepper.

4. Add thyme, sage, and quinoa, to the vegetable mixture. Stir to combine all ingredients and continue to cook until all ingredients are mixed and heated through, 1-2 minutes more.  Stir in balsamic vinegar, and season with additional salt and pepper, if necessary.

5. Transfer to serving dish and enjoy!


Nutrition Information--approximately 175 calories per serving


Monday, November 12, 2012

Cannellini Bean Burgers

Veggie burgers are one of my favorite foods in the entire world so I tend to make some variation of a burger at least once a week. Sometimes, however, I don't have the time or desire to make a complex burger a long list of ingredients and tons of required equipment.  When that happens, this delicious recipe adapted from KathEats.com , is the perfect solution. A simple and satisfying burger that tastes amazing, no food processor required!

Cannellini Bean Burgers
Gluten Free
Serves One

Ingredients--
1/3 cup cannellini beans, drained and rinsed
1 tbsp. quinoa flakes
1 tsp. balsamic vinegar
2 sundried tomato halves, not packed in oil, reconstituted and chopped
1/2 tbsp. fresh parsley, finely chopped
1/4 tsp. dried basil
1/8 tsp. garlic powder
2 slices light gluten free sandwich bread (I used Ener-G Light Tapioca)
salt and pepper, to taste
Optional Toppings--additonal balsamic for drizzling, spinach/lettuce, Dijon mustard

1. Place beans in a microwave safe bowl, cover, and microwave 30 seconds, or until softened. Use the back of the spoon to mash beans until they start to stick together but are still chunky.

2. Add quinoa flakes, balsamic, sundried tomatoes, parsley, basil, garlic powder, salt, and pepper to beans. Mash ingredients together until they are evenly combined and mixture holds together.

3. Use your hands to form mixture into a patty.

4. Heat a skillet sprayed with nonstick spray to medium high heat.

5. Add burger to pan and cook 3-4 minutes, or until lightly browned on the bottom.

6. Flip burger, and cook for an additional 3-4 minutes, or until golden on both sides.

7. Once burger is flipped, place bread in toaster, and toast until golden bread.

8. Plate burger on toasted bread and top with any desired toppings.

Nutrition Information--approximately 205 calories per serving

Wednesday, November 7, 2012

Cinnamon Apple Pancakes with Pumpkin Maple Butter

Imagine a tall stack of fall-infused pancakes layered with a creamy pumpkin spread and oozing with maple syrup. Looks pretty good right? Well, whip up this quick breakfast recipe and you can be enjoying those pancakes in less than 20 minutes. To create this amazing breakfast, I adapted a Hungry Girl pancake recipe and then added in some Fall touches like diced apple, autumn spices, and a decadent pumpkin "butter".

Cinnamon Apple Pancakes with Pumpkin Maple Butter
Gluten Free
Serves One

Ingredients--
3 tbsp. gluten free oats
2 tbsp. gluten free flour blend
1/4 tsp. baking powder
1 Truvia packet
dash of salt
1/4 tsp. cinnamon
1/8 tsp. nutmeg
1/8 tsp. allspice
3 tbsp. liquid egg substitute
1 tbsp. unsweetened original almond milk
1/8 tsp. pure vanilla extract
1/4 of an apple, diced
1 recipe Pumpkin Maple Butter (see below)
2 tbsp. sugar free pancake syrup

1. In a medium bowl, combine oats, flour, baking powder, Truvia, salt and spices (cinnamon, nutmeg, and allspice).

2. Mix in egg substitute, milk, and vanilla. Fold in apple chunks.

3. Bring a large skillet sprayed with nonstick spray to medium-high heat. Add the batter to form 4 mini pancakes. Cook pancakes until just beginning to bubble and are solid enough to flip, about 3 minutes. Gently flip and cook until lightly browned on both sides and cooked through, about 2 minutes more.

4. Place one pancake on serving plate then spread with a layer of pumpkin maple butter. Continue alternating pancakes and pumpkin butter to form a stack of pancakes. Drizzle the entire stack of pancakes with syrup and enjoy!

Nutrition Information-- approximately 175 calories per serving (entire recipe)

Pumpkin Maple Butter
Gluten Free
Serves One

Ingredients--
1/3 cup pumpkin puree
2 tbsp. sugar free maple syrup
1/8 tsp. vanilla extract
1/4 tsp. cinnamon

1. Stir together all ingredients in a microwave safe bowl. Cover and microwave 30-45 seconds or until heated through.

Nutrition Information--approximately 39 calories per serving (entire recipe)


Tuesday, November 6, 2012

Roasted Tomato and Squash Soup

Roasted Tomato and Squash follows the same steps as many of my other soup recipes- roasting vegetables and then pureeing them into a creamy and delightful soup. This method is super simple, versatile, and absolutely amazing. In this recipe, tomatoes, garlic, and butternut squash are the stars of the soup. The combination of vegetables creates a flavorful soup that's perfect for cold Fall evenings.


Roasted Tomato and Squash Soup
Gluten Free
Serves Four

Ingredients--
8-10 Roma Tomatoes, halved lengthwise
4 whole garlic cloves, not peeled
4 tsp extra virgin olive oil, divided
1 medium butternut squash (about 2.5 lbs), peeled and cut into cubes
3/4 tsp. dried thyme
1/2 tsp. dried rosemary
3 to 3.5 cups low sodium chicken broth, divided
dash of crushed red pepper flakes
salt and pepper


1. Preheat oven to 400 degrees. Line two baking sheets with aluminum foil and spray with nonstick spray. (Be sure to choose two baking sheets that will fit in the oven at the same time.)

2. Place tomatoes, cut side up, one baking sheet and drizzle with 2 tsp. of olive oil. Season generously with salt and pepper. Place garlic cloves in the center of a small square of aluminum foil. Spray with olive oil spray and wrap up tightly then set beside the tomatoes.

3. Add butternut squash to the other baking sheet and drizzle with remaining 2 tsp. of olive oil. Sprinkle with thyme, rosemary, and salt and pepper, to taste. Use your hands to mix ingredients until squash is evenly coated in oil and spices.

4. Transfer both baking sheets to the oven and roast, 45-55 minutes, or until tomatoes begin to split and turn golden brown and  squash is golden brown and tender. Stir vegetables halfway through cooking (you don't have to stir the garlic).

5. Once vegetables are roasted, carefully transfer tomatoes and squash to a tall soup pot. Set aside garlic until cool enough to handle, then gently unwrap and squeeze the garlic cloves out of their skin into the pot with the other vegetables.

6. Pour 2 cups of chicken into the pot then use an immersion blender to puree soup until smooth. Stir in 1 more cup of broth.

7. Place pot on stove over medim high heat and bring to boil, stirring occasionally. Reduce heat to a low simmer, cover pot partially with a lid, and let soup simmer gently until heated through and your're ready to eat (at least 15 minutes). Stir soup occasionally.

8. Prior to serving, taste for seasoning then stir in red pepper flakes and any additional seasonings necessary. If soup seems too thick, stir in additional broth.

Nutrition Information--approximately 190 calories per serving (1/4 of the recipe)


*Interested in more pureed vegetable soups? Try this Sweet and Spicy Butternut Squash Soup from the early days of the blog-- http://spicysweetpotato.blogspot.com/2011/08/ultimate-soup.html

Wednesday, October 31, 2012

Irish Nachos

I had never heard of Irish Nachos until about a week ago when the daily Hungry Girl email featured a recipe for them. Traditionally, potatoes are used in Irish Nachos but Hungry Girl's version utilized the often overlooked turnip instead. In the dish, turnip slices are roasted until crisp then piled with typical nacho toppings like salsa and melted cheese. I was very intrigued by the recipe and knew I needed to make my own variation as soon as possible. The ending result  was wonderfully gooey, cheesy, and spicy. I'm not sure if they really reminds me of nachos but Irish Nachos are still a success in my book.

Irish Nachos
Gluten Free
Serves One

Ingredients:
2 roma tomatoes, cut into quarters
1 poblano pepper, cut into a large dice
1 medium turnip (about 12 oz), cut into thin half moon slices
1/4 tsp. garlic powder
1/4 tsp. chili powder
Dash black pepper
2 slices fat-free white cheddar cheese
1/4 cup salsa
salt and pepper
Optional Toppings- hot sauce, additional salsa

1. Preheat oven to 400 degrees. Place tomatoes and peppers on a baking sheet lined with aluminum foil. Spray vegetables thoroughly with olive oil spray and season with salt and pepper.

2. Roast vegetables 25-30 minutes, or until tomatoes begin to split and peppers begin to blister. Stir vegetables halfway through cooking.

3. Set aside roasted vegetables and raise oven temperature to 450 degrees. Respray baking sheet with nonstick spray.

4. Lay turnip slices on the baking sheet, and sprinkle with salt. Bake for 12 minutes.

5. Flip slices, and bake until tender on the inside and slightly crispy on the outside, about 12 more minutes.

6. Remove turnip slices from oven but leave oven on.

7. Spray a oven safe plate or dish with nonstick spray and closely arrange turnip slices on the plate. Sprinkle with garlic powder and chili powder. Tear cheese slices into pieces and place on top of turnips. Evenly distribute roasted tomatoes, pepper, and salsa on top of cheese

8. Transfer plate to oven and bake until cheese has melted, 1 - 2 minutes.

9. Top nachos with any desired optional toppings.

Nutrition Information--approximately 205 calories per serving (entire recipe)


Monday, October 29, 2012

Provencal Tilapia

Provencal Tilapia is a maginificent dish that was adapted from a recipe by Rachael Ray.  In this amazing entree, delicate tilapia filets are coated in an olive paste, topped with herbs and fresh tomatoes, then oven roasted on a bed of fresh vegetables. This recipe requires little prep or clean-up since everything is roasted in the same pan yet it still manages to taste quite complex and elegant.

Provencal Tilapia
Gluten Free
Serves Four

Ingredients--
2 cups broccoli, broken into florets
2 tsp. extra virgin olive, divided
1 pound fresh green beans
2 cloves garlic, sliced
1 tsp dried parsley, divided
salt and pepper
1 cup pitted nicoise or kalamata olives
1 lb. tilapia filets, fresh or frozen (thawed according to package directions)
2 large tomatoes, thinly sliced
1 tsp. dried thyme
1/2 tsp. dried marjoram

1. Position a rack in the center of the oven and preheat to 450 degrees . Line a large rimmed baking sheet  with aluminum foil and spray with nonstick spray.

2. Add broccoli to the pan. Drizzle with 1 tsp. olive oil and season with salt and pepper. Transfer to oven and roast 10 minutes.

3. Meanwhile, use a food processor or immersion blender to pulse the olives into a thick paste. Set aside.

4. Once broccoli is removed from oven, stir in green beans, garlic, and 1/2 tsp of the parsley. Season with salt and pepper than drizzle with remaining 1 tsp. of olive oil. Stir until vegetables are coated in oil and spices (or use your hands to mix), then spread vegetables into an even layer on the baking sheet.

5. Season the fish with salt and pepper, then slather with the olive paste. Carefully set on top of the vegetables.

6. Top each piece of cod  with a shingled layer of the tomatoes. Sprinkle with thyme, marjoram, and remaining 1/2 tsp of parsley.

7. Transfer pan to oven and roast until  fish is cooked through and flakes easily, about 18 minutes.

Nutrition Information--approximately 225 calories per serving (1/4 of the recipe- 1 piece of fish and 1/4 of the vegetables)

Before Roasting...

After Roasting

Wednesday, October 24, 2012

Asian Tofu Lettuce Wraps

Asian Tofu Lettuce Wraps may look like a simple and ordinary recipe, however, while the wraps are indeed simple to make, their flavor is phenomenal. First, crumbled tofu is sauteed with garlic and ginger until golden and tasty. Next, a few spices and vegetables are thrown into the pan and sauteed until all the flavors meld.After that, simply scoop the tofu filling into the lettuce cups, wrap, and devour. The end product is a delectable gluten free meal that's hand held, fun to eat, and different from the norm.

Asian Tofu Lettuce Wraps
Gluten Free
Serves One

Ingredients--
7-8 Paddy Straw dried mushrooms (or any kind of dried mushrooms)
1/2 tsp. extra virgin olive oil
1 small garlic clove, minced
1 tsp. fresh ginger root, grated
3 oz. extra firm light tofu (like the kind by Mori-Nu), check for gluten
1/4 cup frozen peas, defrosted
1/8 tsp. chili powder
1/8 tsp. paprika
1 tbsp. gluten free soy sauce
1/2 teaspoon Balsamic Vinegar
4-6 butter lettuce wraps (or whatever kind of lettuce you prefer for wrapping)
Salt and Pepper

1. Place mushrooms in small bowl and cover with boiling water. Let sit until soft, 8-10 minutes. Remove mushrooms from water, dry thoroughly, and chop into bite sized pieces. Set aside.

2. Heat oil in a small nonstick skillet over medium-low heat. Add ginger and garlic to skillet and saute for 1 minute.

3. Wrap tofu in a paper towel and dry thoroughly before adding to skillet. Use a spatula to crumble tofu into very small pieces. Cook tofu for 5-6 minutes, until most of the liquid evaporates and tofu starts to turn golden.

4. Add the mushrooms, chili powder, paprika and soy sauce to the pan, then cook until most of the liquid has been absorbed.

5. Stir in the peas and continue cooking, just until peas are heated through.

6. Remove the pan from the heat and stir in balsamic vinegar. Test for seasoning, then add salt and pepper, to taste.

7. Plate the lettuce cups and divide tofu mixture between lettuce. Fold up and enjoy!

Nutrition Information--approximately 110 calories per serving


Tuesday, October 23, 2012

Roasted Buffalo Shrimp

I stumbled upon the recipe for Roasted Buffalo Shrimp when I was searching for a fast and delicious way to use up frozen shrimp. After a few small changes, this dish from MarthaStewart.com fit the bill perfectly. The shrimp are tossed in a sophisticated version of a  "buffalo" sauce and then quickly roasted in the oven. The end result is a flavorful and unique shrimp dish that make a great light entree or easy appetizer.

Roasted Buffalo Shrimp
Gluten Free
Serves Four

Ingredients--
1.5 tbsp. lemon zest, finely grated
1.5 tbsp fresh squeezed lemon juice
1 garlic cloves, minced
1.5 teaspoons sweet paprika
1/8 teaspoon cayenne pepper, or more to taste
1 tsp. coarse salt
1 tbsp + 1 tsp. honey
2 tbsp extra-virgin olive oil
1 pound medium to large shrimp, peeled and deveined (You can leave the tails-on depending on how you are serving the shrimp)


1. Preheat oven to 450 degrees. Line a large baking sheet with parchment (or foil sprayed with nonstick spray) and place in the oven to heat.

2.  Stir together lemon zest, garlic, celery seeds, paprika, cayenne, salt, the honey, and oil in a large bowl. Add shrimp, and toss to coat well.

3. Place shrimp in a single layer on hot baking sheet. Roast, without flipping, until browned on bottoms and opaque throughout, about 5 minutes.

Nutrition Information--approximately 200 calories per serving (1/4 of the recipe)

Thursday, October 18, 2012

Roasted Eggplant Curry


Roasted Eggplant Curry, adapted from HealthfulPursuit.com, is  a terrific way to enjoy Indian food without having to go out to a restaurant. I'm sure it isn't 100% authentic when compared to traditional Indian curries, however, it does incorporate many Indian spices and ingredients. Plus, it tastes phenomenal so really what else matters? In this recipe, roasted eggplant is slowly simmered with tomatoes and spices to create an enticing and exotic tasting curry. This dish tastes great on it own, or you can serve it over roasted vegetables or rice. It does require a few unique spices but you should be able to locate all of them at any major supermarket and they can used in countless Indian dishes.

Roasted Eggplant Curry
Gluten Free
Serves Four

Ingredients--
2 medium-sized eggplants
1 tbsp. extra virgin olive oil, divided
2.5 tsp. cumin seeds
2 garlic cloves, minced
2 tbsp ginger root, grated
1 can (14.5 oz) diced tomatoes, not drained
1 tsp ground coriander
1 tsp turmeric
1 tbsp garam masala
Salt
1/4 cup fresh parsley, chopped, divided


1. Preheat oven to 425 degrees. Line a baking sheet with aluminum foil and spritz with nonstick spray.

2. Slice the eggplant in half lengthwise and drizzle 1/2 tsp. of olive oil on the flesh side of each eggplant half. Season with salt. Place eggplant flesh side down on baking sheet and roast for 25-30 minutes or  until the flesh is tender and the outside is a nice dark charred color.

3. Meanwhile, heat the remaining 2 tsp. of olive in a large saucepan over medium  heat. Add the cumin seeds and cook for 1-2 minutes or until fragrant and toasted, stirring constantly (watch seeds carefully, they will burn quickly!).

4. Add the ginger and garlic to the pan and saute for 1-2 minutes more or until fragrant.

5. Stir  in the tomatoes, coriander, turmeric, garam masala and 1/4 tsp of salt. Turn the heat to  medium low and allow mixture to cook about 8 to 10 minutes more, stirring often.

6. When the eggplant is done roasting, set it aside until cool enough to handle. Once eggplant is slightly cooled, peel off and discard the charred skin, then scoop the flesh into a bowl. Use a potato masher to roughly mash eggplant (don't worry if it's not perfect, since the curry will be pureed at the end), and add it to the stove top mixture. Cook for another 3-5 minutes, or until  heated through.

7. Sprinkle curry with 2 tbsp. of the fresh parsley, then use to an immersion blender to blend mixture until pureed but still chunky. (Alternatively, transfer mixture to a food processor and puree).

8. Divide curry into serving dishes and garnish with remaining parsley.

Nutrition Information--approximately 120 calories per serving (1/4 of the recipe)

Tuesday, October 16, 2012

Cannellini Bean Bolognese


Cannellini Bean Bolognese is a quick yet filling vegetarian sauce that makes the perfect topping for gluten free noodles, polenta, or anything else you need a topping for. This tasty sauce requires very little effort or time yet tastes as if it has been simmering all day. Plus, it's a great way to use up any leftover beans you might have in your fridge.


Cannellini Bean Bolognese
Gluten Free
Serves One

Ingredients--
1 garlic clove, minced
1/4 cup canned cannellini beans, drained and rinsed
3/4 cup crushed tomatoes
1/4 tsp. dried oregano
1/2 tsp. balsamic vineger
1 tsp. grated parmesan cheese
a few leaves fresh basil, chopped
salt & pepper

1. Spray a medium saucepan with nonstick spray and heat over medium-high heat.

2. Add the garlic, and cook until fragrant, about 30 seconds.

4.Stir in the beans, tomatoes, oregano, and 1/8 tsp salt. Bring sauce to a summer, then reduce heat to medium low, cover and cook until the sauce has reduced and thickened slightly, about 15 minutes. Stir sauce occasionally.

5. Stir in the vinegar and turn off the heat. Season to taste, with salt and pepper.

6. Garnish sauce with parmesan and fresh basil prior to serving.

Nutrition Information--approximately 130 calories per serving (entire recipe)


* This recipe was based on the Herbed Tofu Marinara I posted a few months ago. If you like this recipe, then you definitely need to try the tofu variation.
http://spicysweetpotato.blogspot.com/2012/03/herbed-tofu-marinara.html


Roasted Portobello Tacos

Roasted Portobello Tacos is a variation of a recipe I found on KeepInItKind.com. In this elegant twist on tacos, a scrumptious vegetable saute replaces the typical salsa as the hearty portobello mushroom stands in for the meat. The addition of mediterranean flavors such as balsamic vinegar, olives, and sundried tomatoes takes these exceptional yet easy tacos to the next level.


Roasted Portobello Tacos
Gluten Free
Serves One

Ingredients:
1 large portobello mushroom,
2 tsp gluten free soy sauce
1 tsp balsamic vinegar
1/4 tsp liquid smoke*
1/4 tsp dried thyme
1/4 tsp dried marjoram
1 small garlic clove, minced
1/4 cup frozen peas, thawed and patted dry
2 kalamata olives, pitted and finely chopped
2 sundried tomatoes halves, reconsituted and chopped
1/4 of a green bell pepper, thinly sliced
1/4 tsp herbes de Provence
2 tbsp. fresh parsley, finely chopped
salt and pepper to taste
2 (6-inch) corn tortillas, check for gluten
Optional--fresh spinach, baby kale, or arugula for topping

1. Preheat oven to 400 and line a small baking sheet with parchment paper (or aluminum foil sprayed with nonstick spray).  Remove the stem from the mushroom and finely chop. Set aside.

2. In a small bowl, whisk together the soy sauce, balsamic vinegar, liquid smoke, thyme and marjoram.  Place mushroom cap in bowl and turn to coat on all sides. Let marinate for 5-10 minutes (This a good time to prep the rest of the ingredients).

3. Remove mushroom from marinade and place stem side up on prepared baking sheet. Drizzle a few spoonfuls of marinade over mushrooms and reserve remaining marinade

4. Bake in the oven for 10-15 minutes (depending on how firm you want them).  Remove and let cool until they are cool enough to handle.

5. While the mushrooms are in the oven, you can begin cooking the vegetables. Spray a medium skillet with nonstick spray and heat to medium low.

6.   Add the garlic to the pan and sauté for one  minute, or until fragrant.  Add the reserved mushroom stems, peas, olives, sundried tomatoes, bell pepper, and  herbes de provence , Saute until bell peppers start to get a little soft, about 5-7 minutes. Season with salt and pepper to taste. Stir in parsley and remove pan from heat.

7. Once the mushrooms are cool enough to handle, slice them, on a diagonal, into wide strips.

8.  Wrap the corn tortillas up in the damp paper towel and microwave until warm and pliable, 15-30 seconds.

9. Place tortillas flat on serving plate and divide the sauteed vegetable mixture amongst the  tortillas. Top each tortillas with half of the mushroom slices. Serve immediately and Enjoy!

Nutrition Information--approximately 205 calories per serving (entire recipe)

*You can find liquid smoke in the BBQ sauce section of any major super market.


Monday, October 15, 2012

Pumpkin Spice Cornbread

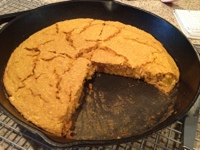
Pumpkin Spice Cornbread, adapted from the Daily Garnish, is the perfect bread for serving alongside hearty stews and soups. It has all the traditional cornbread flavors but the addition of pumpkin, maple syrup, and a few extra spices adds a hint of sweetness to this delectable bread. The cornbread is baked in a cast iron skillet which yields the perfect crusty exterior and fluffy interior. Plus, using the cast iron skillet just makes the cornbread seem more authentic!

Pumpkin Spice Cornbread
Gluten Free
Serves 12

Ingredients--
1 cup gluten free cornmeal
1 cup gluten free flour mix (or gluten free all purpose flout
1 cup frozen corn, thawed and thoroughly dried
1 tablespoon baking powder
1 teaspoon sea salt
1/2 teaspoon cinnamon
1/4 teaspoon nutmeg
1/8 teaspoon ginger
dash of cayenne, if desired
1 cup + 2 tablespoons pumpkin puree
3 tablespoons unsweetened applesauce
2 teaspoons grapeseed oil (or canola oil)
1/3 cup unsweetened orginal almond milk
1/4 cup sugar free pancake syrup
1/2 cup liquid egg substitute


1. Preheat the oven to 400 degrees. Spray a 12-inch cast iron skillet with nonstick spray. (If you don't have a cast iron skillet, a square baking dish will work).

2. In a large bowl, stir together cornmeal, flour, thawed corm, baking powder, salt, and spices (cinnamon, nutmeg, ginger, and cayenne) until combined.

3. In a medium mixing bowl, stir together pumpkin, applesauce, oil, milk, syrup and eggs until combined.

4. Pour pumpkin mixture into cornmeal mixture and stir until just combined.

5. Add cornbread batter to the cast iron skillet and spread out evenly.

6. Bake at 400 degrees for 26-30 minutes or until slightly golden on top and firm to the touch. (Mine was done after 27 minutes.)

7. Allow bread to cool for a few minutes prior to slicing and serving.

Nutrition Information--approximately 115 calories per serving (1/12 of the recipe)